Hi,
i got a replacement for my not proper working CerboGX.
I thought i've seen somewhere a how to replace the old one with the new one with no loss of data, but i don't remeber where i've seen this how to.
Anyone knows this?
Regards
Matthias
Hi,
i got a replacement for my not proper working CerboGX.
I thought i've seen somewhere a how to replace the old one with the new one with no loss of data, but i don't remeber where i've seen this how to.
Anyone knows this?
Regards
Matthias
@Alexandra Thanks! What a stupid question from my side... The Video is also linked in the VRM Menu, but somethimes i'm blind...
@Alexandra It appears this video was removed?
My Victron dealer sent a replacement GX but they sent it bare without any connectors or accessories. Will I need to have them both installed and powered up to do the transfer?
Hi @NorthTown2022,
The video was removed due to a slight inaccuracy. The intention was to replace it, but that hasn't occurred yet, instead we are working to change this GX replacement workflow to make it extremely clear and anxiety-free.
For now;
How to replace a GX device and maintain VRM history
Use this option in case the old GX device is defective and has been replaced by a new one.
Procedure
Step 1: install the new GX device, and then add it to VRM using the normal Add installation feature (https://vrm.victronenergy.com/add-installation). To make it clear, add a suffix of -NEW to the name while adding that installation.
Step 2: make a note of the VRM Portal ID of this new system.
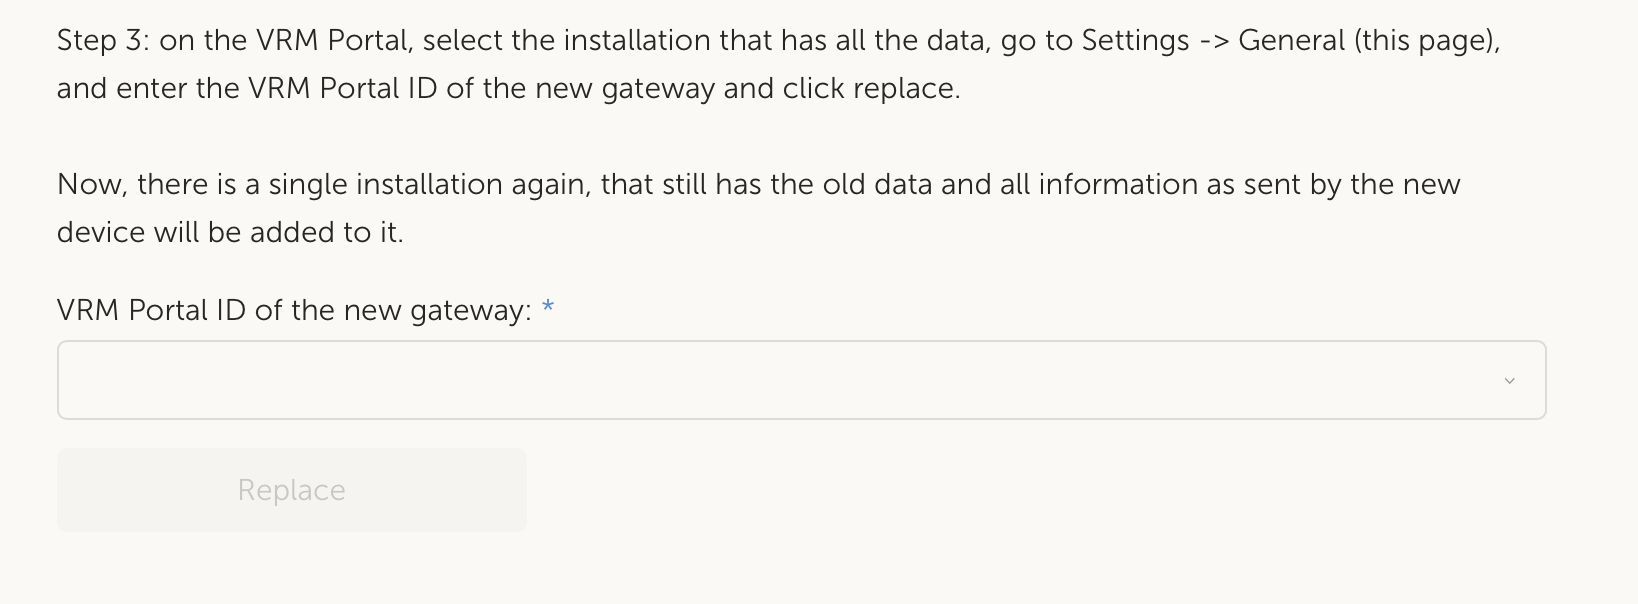
Step 3: on the VRM Portal, select the installation that has all the history data you wish to maintain in VRM, select Settings -> General, and enter the VRM Portal ID of the new replacement GX that you just installed in step 1 and click replace.
Now, there is a single installation again, that still has the old data and all information as sent by the new device will be added to it.
Hi @NorthTown2022,
The video was removed due to a slight inaccuracy. The intention was to replace it, but that hasn't occurred yet, instead we are working to change this GX replacement workflow to make it extremely clear and anxiety-free.
For now;
How to replace a GX device and maintain VRM history
Use this option in case the old GX device is defective and has been replaced by a new one.
Procedure
Step 1: install the new GX device, and then add it to VRM using the normal Add installation feature (https://vrm.victronenergy.com/add-installation). To make it clear, add a suffix of -NEW to the name while adding that installation.
Step 2: make a note of the VRM Portal ID of this new system.
Step 3: on the VRM Portal, select the installation that has all the history data you wish to maintain in VRM, select Settings -> General, and enter the VRM Portal ID of the new replacement GX that you just installed in step 1 and click replace.
Now, there is a single installation again, that still has the old data and all information as sent by the new device will be added to it.
@Guy Stewart (Victron Community Manager)
Thank you for the reply.
Yes I have read the instructions settings --> general. It sounds like both GX devices need to be installed at same time to do the transfer or am i misunderstanding?
My Victron dealer sent a replacement but did not send anything but the bare GX.. no connectors!
If the older Cerbo is still functional, go through all menus (using Remote Console) and take screenshots (or write down all settings).
@Seb71 yeah for sure i will screenshot everything as a precaution. The GX is at a remote location and I can't get there to do the work for a few days yet. Thank you.
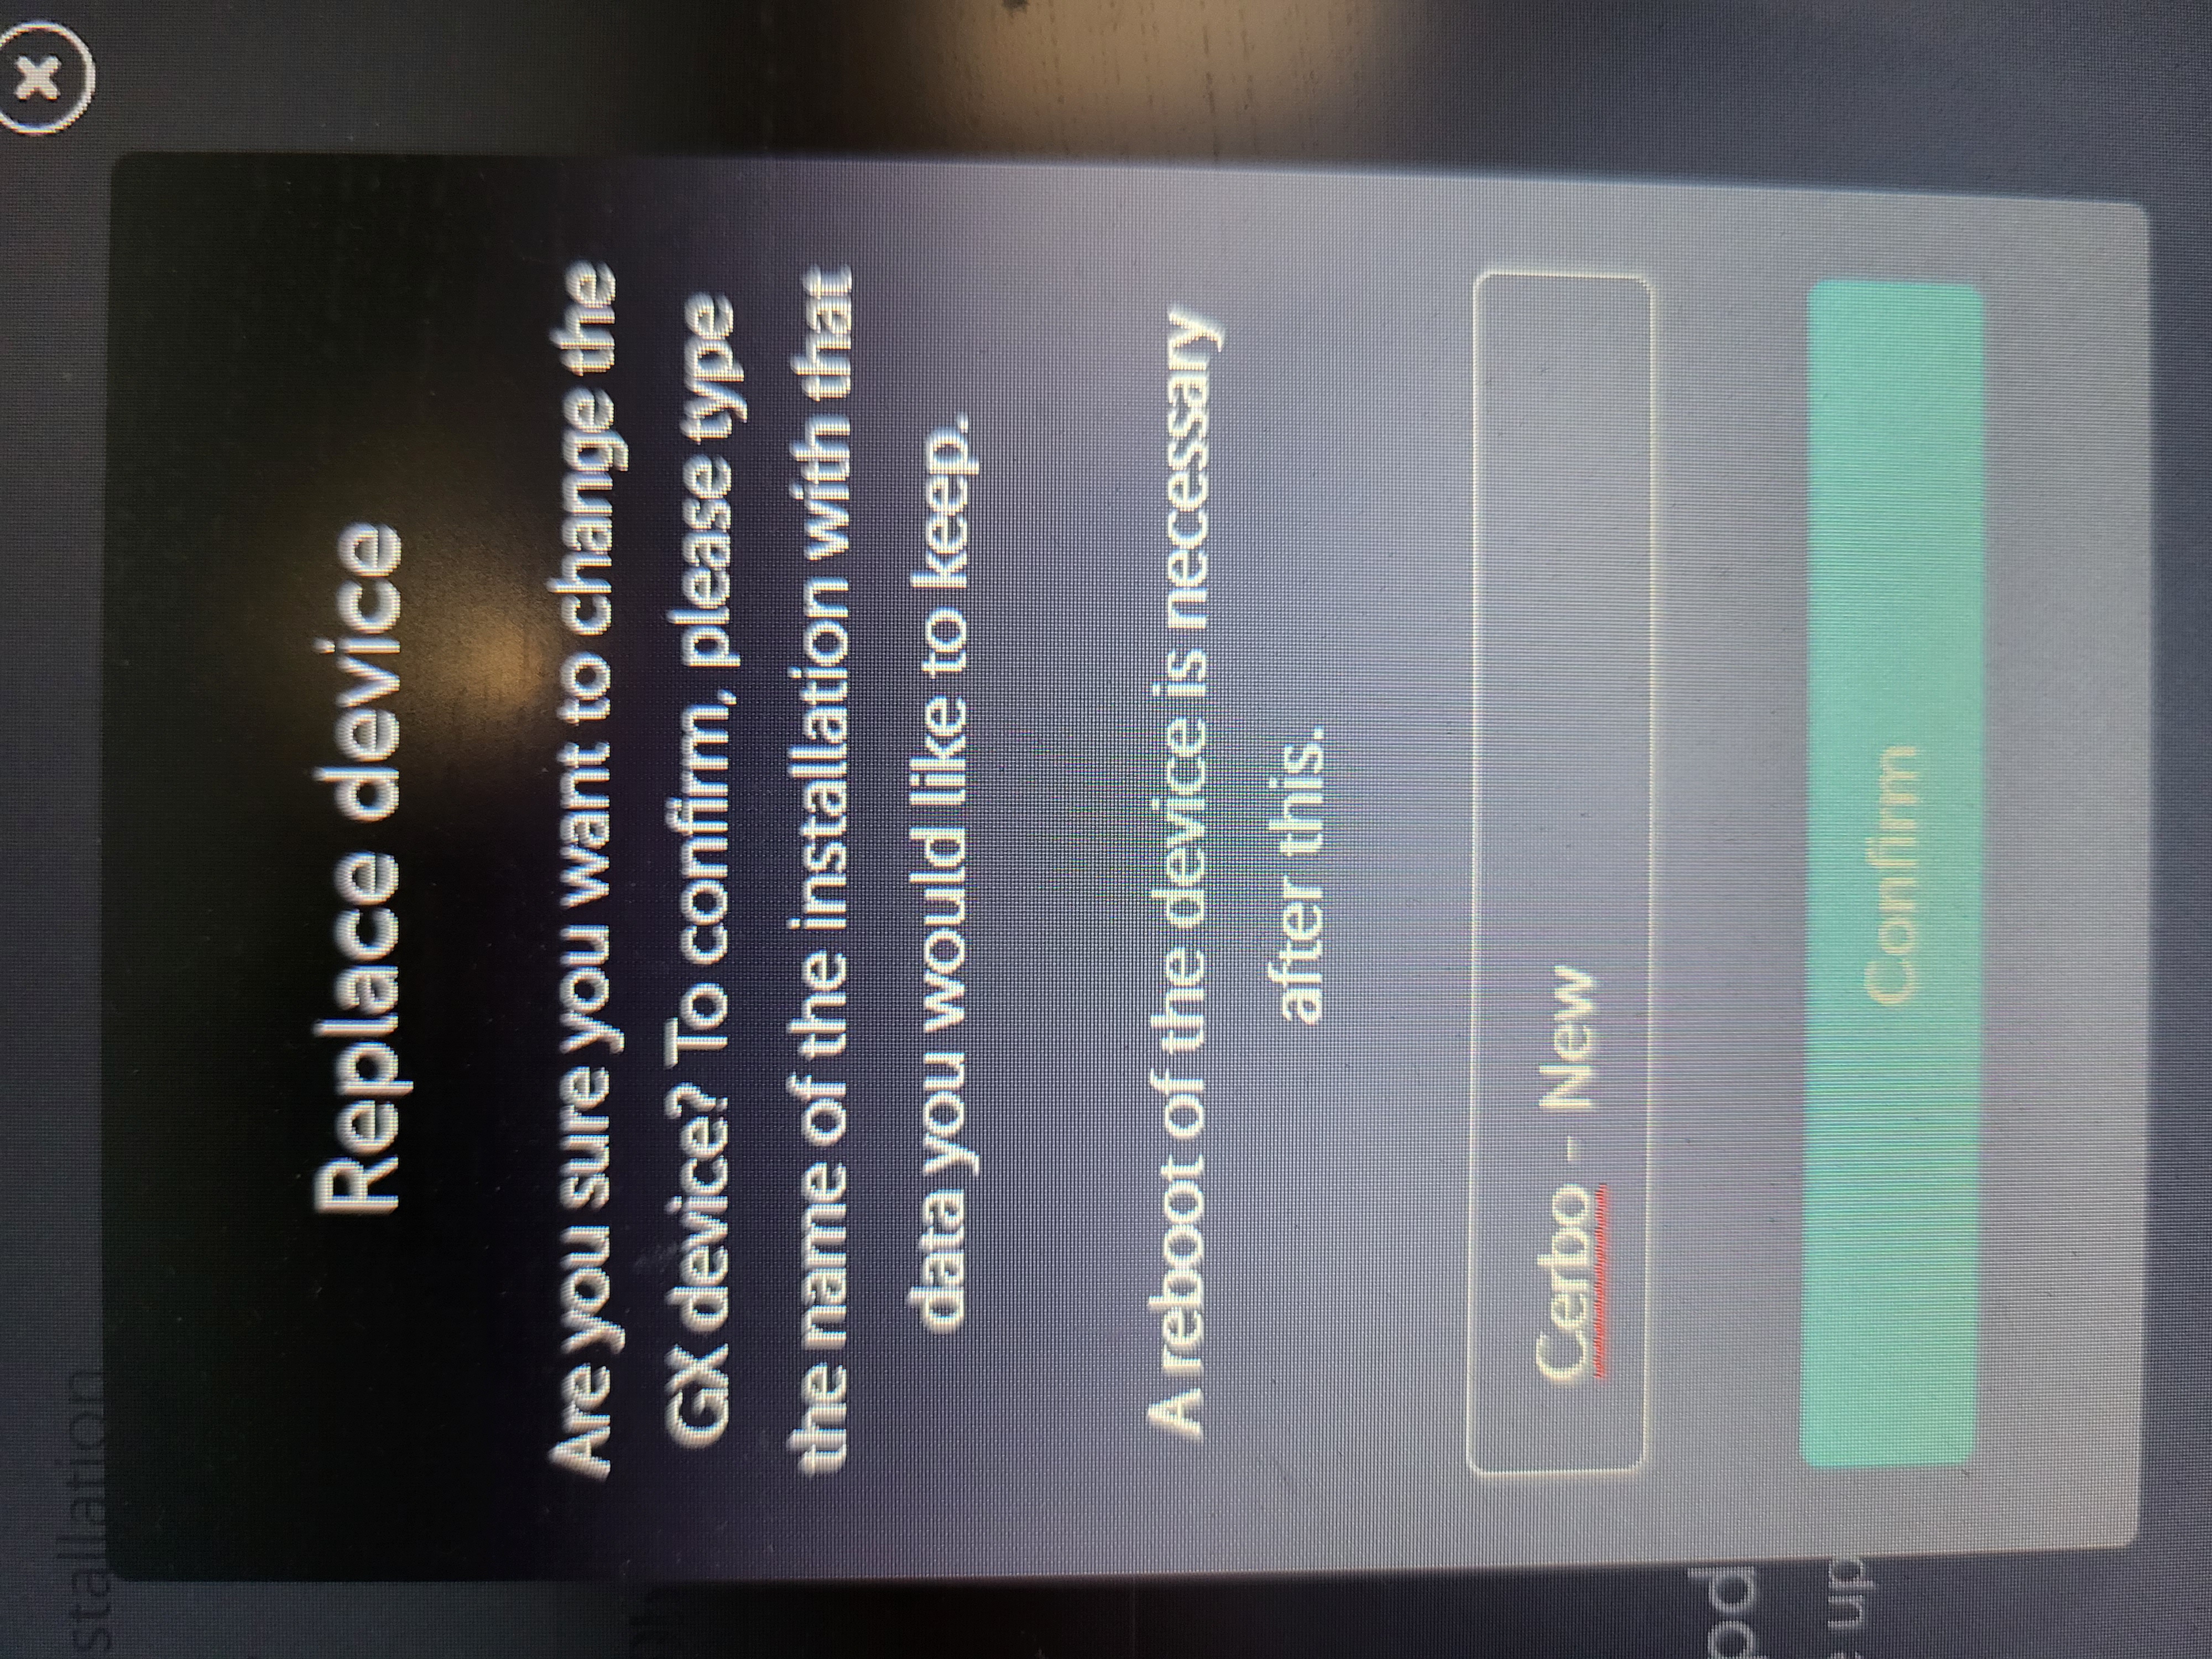
Tried to follow instructions several times and cannot seem to make this transfer work.
I unplugged the original GX and plugged in the new one, did the install.
I then plug in the original GX, setting--> general --> enter VRM portal ID of new gateway.
The device asks me to type name of installation with that data you would like to keep.
So I type in name of original GX because it has the data i want to keep right?
The install did accept the gateway name a couple of times but now it doesn't.
Once again I can only power up on GX at a time as my dealer did not send any terminal connectors, just a bare GX.
What am i missing?
Once this is done, you follow the instructions/video for VRM to change the registered GX, this is to keep all the historic data/charts on your portal.
I find this wording a little confusing.
Just to confirm I want to name the new Cerbo here so it can use historic data from old install?