question

nhuillard avatar image
nhuillard asked

Broken Bat- screw on Multiplus-II 3k: how to fix?

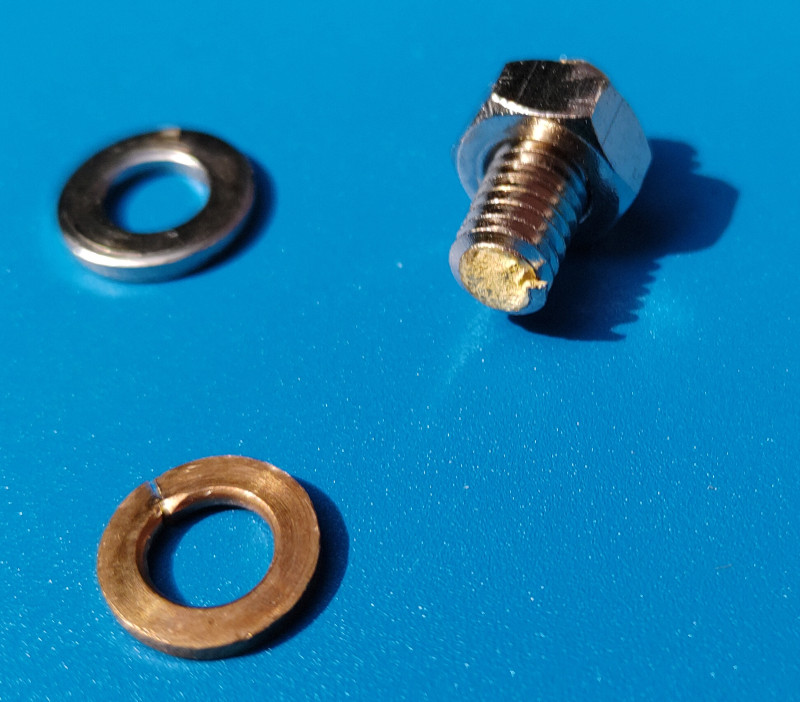
While rewiring a Multiplus-II installation, I broke the Bat- screw, not by over-tightening it (I use a dynamometric wrench), but probably while guiding the 35mm2 wire and rotating it many times. I thought the nut was sufficiently hand-tightened to prevent the wire from moving, but apparently not...
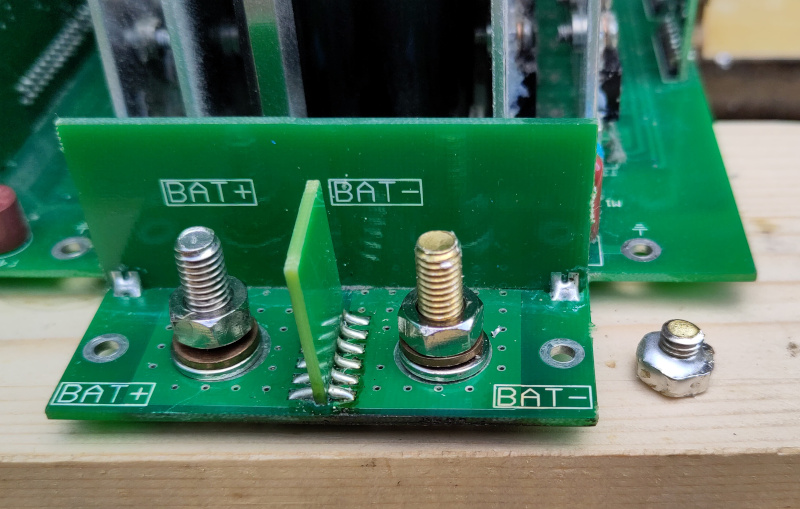
Here is the result:

img-20220706-111413.jpg

img-20220706-111434.jpg

My plan to repair this is either:

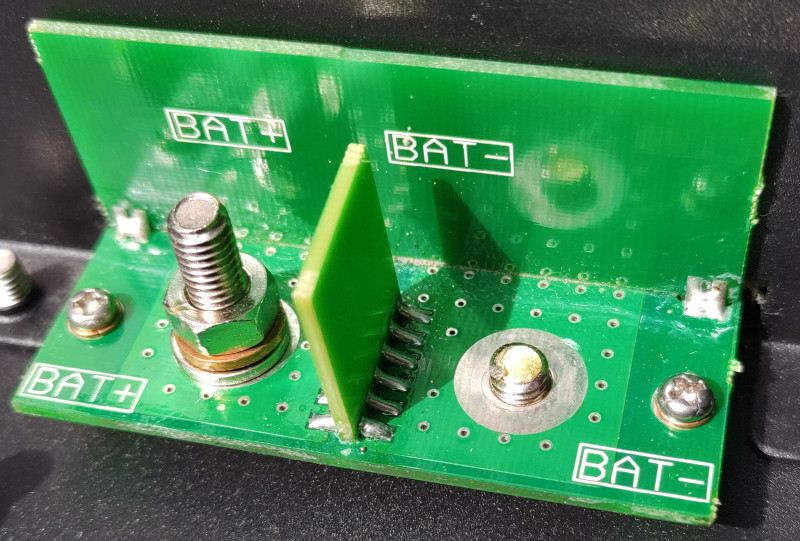
  1. carefully drill the remaining of the screw, re-thread the remaining of the soldered nut on the other side, and screw what's left (second photo), probably adding a bit of solder
  2. unsolder the remaining, as it appears to be a soldered nut on the bottom of the PCB, and replace it with a new brass bolt, to be also soldered

What do experts thing about that? What kind of soldering iron do I need (20W, 50W, more)?

Since this setup allows for 35A sustained charging, 50A sustained discharging, and 115A peak discharging (PylonTech battery at 48V), I hope that will be OK...

battery connection
2 |3000

Up to 8 attachments (including images) can be used with a maximum of 190.8 MiB each and 286.6 MiB total.

3 Answers
sharpener avatar image
sharpener answered ·

It looks as though there are a few turns of usable thread left on the stud. A less invasive repair might be to get or make a female spacer (ideally from hexagonal bar), screw that on to the stub that remains, and then bolt the connection onto the top end of the spacer. No heat, no soldering, purely mechanical, easy to reverse.

Otherwise I think yr method 2 better, as method 1 likely to damage the soldered joint anyway. I think I would attempt it with the biggest bit on the end of my butane gas pencil soldering iron. You might also need to re-inforce the pcb track with e.g. copper braid to wherever it is connnected to.

2 |3000

Up to 8 attachments (including images) can be used with a maximum of 190.8 MiB each and 286.6 MiB total.

nhuillard avatar image
nhuillard answered ·

Here is the replaced screw.

img-20220721-160906.jpg

It was the first time I used a butane soldering iron, with a small bit. But it was outside with lots of light, and I didn't clearly see the flame, hence the small burn of the PCB itself. The metal parts are OK though, and I oriented the flame as to not heat other components. I worked on the other side of the PCB, but didn't take a picture of it...

The Multiplus works great now, already at full power (in and out of the battery), without any sign of increasing temperature near this port, as seen with a thermal camera.

Thanks @sharpener for the advices!


1 comment
2 |3000

Up to 8 attachments (including images) can be used with a maximum of 190.8 MiB each and 286.6 MiB total.

sharpener avatar image sharpener commented ·
Thanks for the update and neat job @nhuillard ! It's very satisfying to bring an expensive piece of kit back to life with a DIY repair costing a few pence in materials, you must be very pleased.
0 Likes 0 ·
nhuillard avatar image
nhuillard answered ·

So: I took off the main PCB to access the other side. Quite easy to do. I tried a random 100W electric iron, which is way to weak. I ordered a tiny bit for a big butane soldering iron. I'll report when I have it and finally replace the whole bolt.

Re. your suggestion, I fear that the spacer or nut wouldn't be large enough for the 35mm2, or might break the remaining half of the thread turns at the worst moment. That was tempting though ;-)

2 |3000

Up to 8 attachments (including images) can be used with a maximum of 190.8 MiB each and 286.6 MiB total.

Related Resources

Additional resources still need to be added for this topic