question

pulquero avatar image
pulquero asked

Package for I2C devices

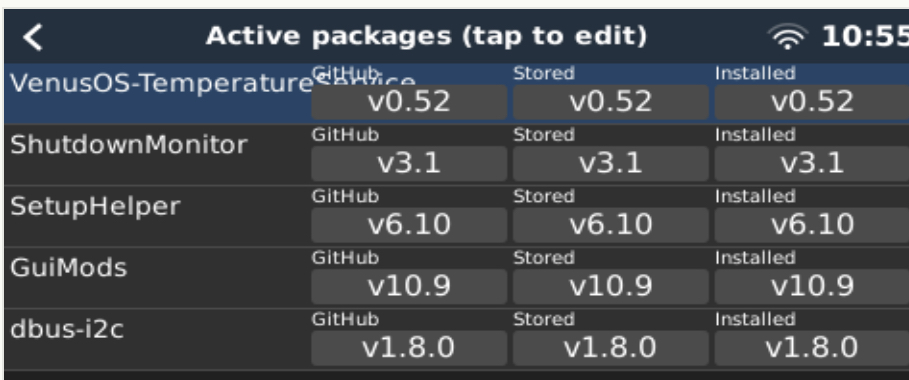
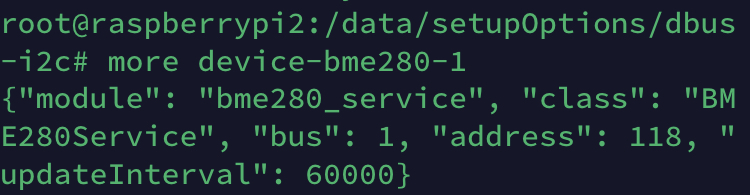
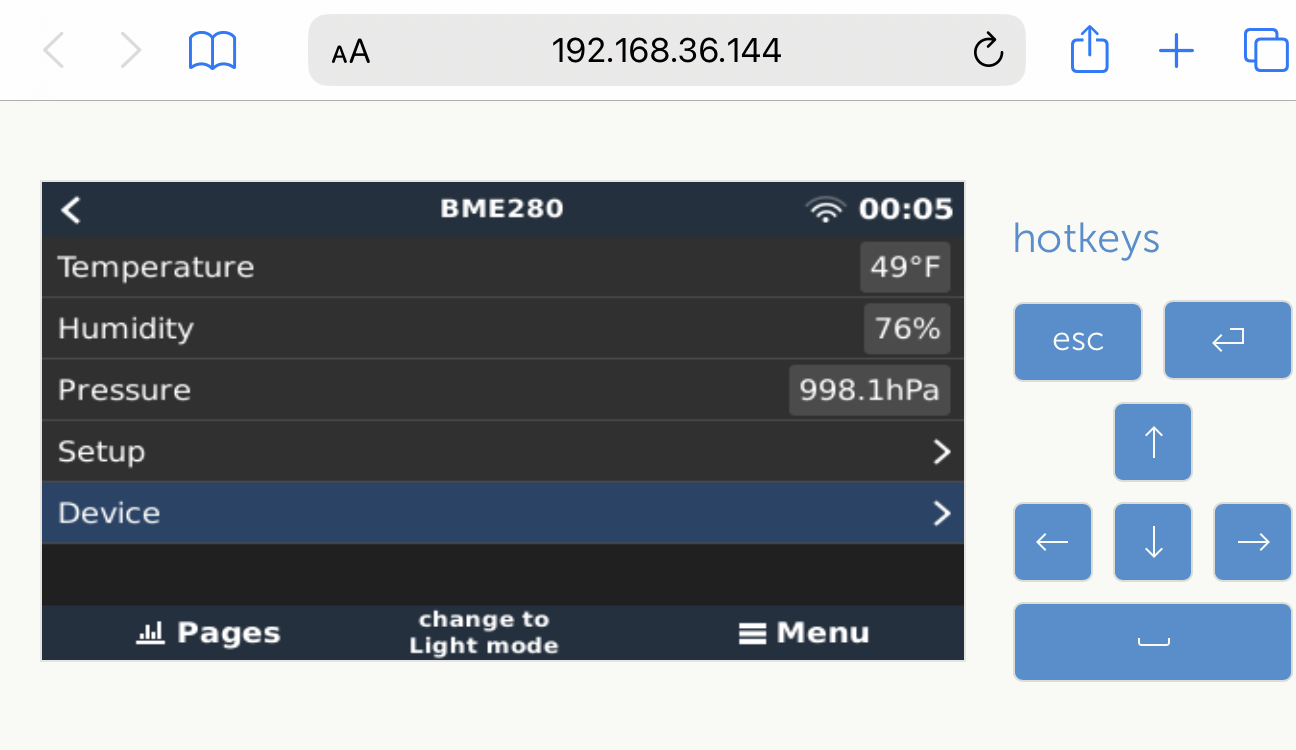
I've put together a "SetupHelper" package for integrating I2C devices, https://github.com/pulquero/dbus-i2c/. Currently, it offers support for BME280 as a temperature service and INA219 as a DC load/source. It is written in a modular way to make it easy to add more devices in the future. As part of that, I've exposed a mechanism to download and install 3rd-party Python libraries so you don't have to write all the I2C code from scratch.

Note: for INA219, I have also written a complimentary DC system service (https://github.com/pulquero/DCSystemAggregator) that aggregates data across multiple DC loads/sources. That is, you can use INA219 (or anything else) to monitor individual loads/sources, and the aggregator will be provide a unified overall view (e.g. DC power in the VRM dashboard).
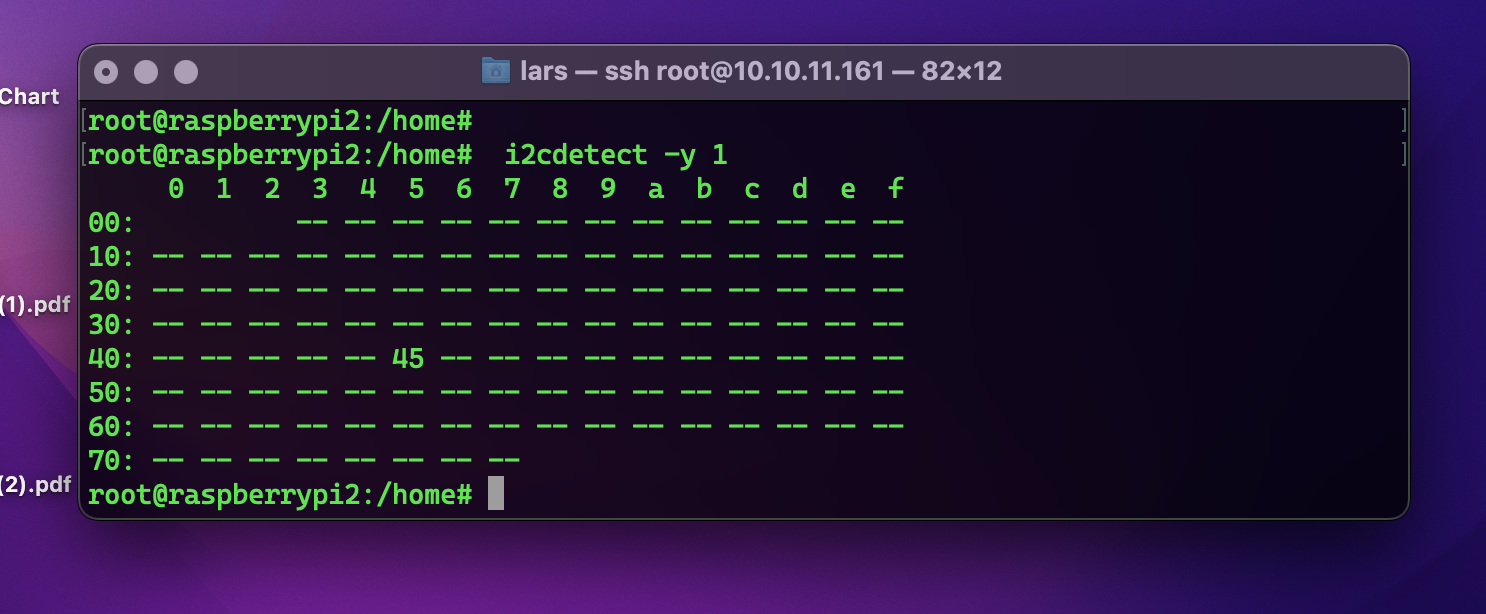
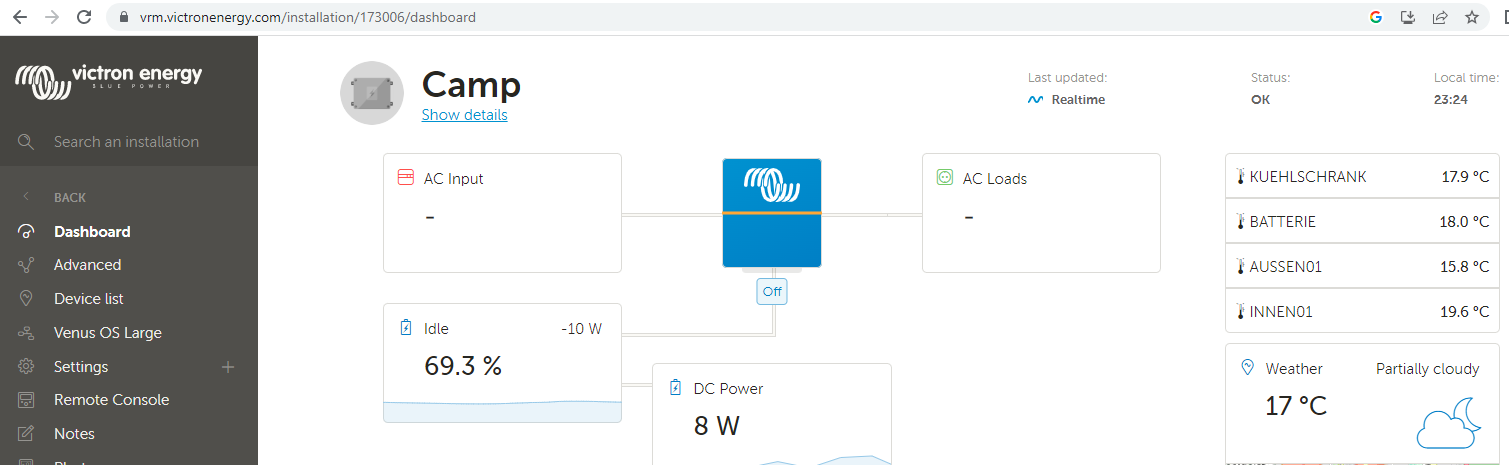
Venus OSRaspberry Pi
1 comment
2 |3000

Up to 8 attachments (including images) can be used with a maximum of 190.8 MiB each and 286.6 MiB total.

pulith avatar image pulith commented ·
how do i check if i2c is active. what is the command to use in venus os under root.
0 Likes 0 ·
11 Answers
pulquero avatar image
pulquero answered ·

Support added for SHT3x temperature sensors.

2 |3000

Up to 8 attachments (including images) can be used with a maximum of 190.8 MiB each and 286.6 MiB total.

Lars Filusch avatar image
Lars Filusch answered ·

Hey,

i have the package running and a SHT30 connected.

But i don't know how to make the temp and humidity visible in VenusOS.

I have two different sht30 sensors on address x44 and x45.

bildschirmfoto-2023-03-15-um-194324.png


2 |3000

Up to 8 attachments (including images) can be used with a maximum of 190.8 MiB each and 286.6 MiB total.

pulquero avatar image
pulquero answered ·

Did you run /data/dbus-i2c/setup? It should ask you some questions to configure up the sensor.

Alternatively, create a json file per sensor in /data/setupOptions/dbus-i2c/, e.g.

/data/setupOptions/dbus-i2c/device-sht3x-1:

{"module": "sht_service", "class": "SHT3xService", "bus": 1, "address": 68, "updateInterval": 10000}

Note, the I2C address is in decimal not hex.

2 comments
2 |3000

Up to 8 attachments (including images) can be used with a maximum of 190.8 MiB each and 286.6 MiB total.

Lars Filusch avatar image Lars Filusch commented ·
updateinterval is seconds?
0 Likes 0 ·
pulquero avatar image pulquero Lars Filusch commented ·
milliseconds
0 Likes 0 ·
Lars Filusch avatar image
Lars Filusch answered ·

no i don’t.

didn’t notice that there is a setup, had tried to find a readme, but maybe i’m blind… give it try later.

thx

Lars

2 |3000

Up to 8 attachments (including images) can be used with a maximum of 190.8 MiB each and 286.6 MiB total.

klaus-deiss avatar image
klaus-deiss answered ·

@pulquero coincidentally, I stumbled upon this thread yesterday. Wow!

In another project I have just successfully used an INA219 on a Raspi.


By looking at your other projects on GitHUB (especially here velib_python) I finally understood the concept of DBUS under Venus OS. For that already many thanks!

Unfortunately, I won't be able to access my venus installation until next weekend, otherwise I would have installed your ic2 integration right away.


So some questions in advance, just to figure out whether I understood your project prpoerly:


- Can I connect one / or more INA219 (SDA ==> GPIO02 and SCL ==> GPIO03) and then get a new device displayed if DC Load is activated as described?

- And this device later also appears in the VRM portal?

- The device can be a load or a source? (I assume that this is set via /data/dbus-i2c/setup?)


If that were true it's exactly what I've been looking for so long time. A perfect way to integrate devices like Battery charger / generator and so on if they are not from Victron.


Klaus


2 comments
2 |3000

Up to 8 attachments (including images) can be used with a maximum of 190.8 MiB each and 286.6 MiB total.

pulquero avatar image pulquero commented ·

@Klaus Deiss yes, you can have multiple INA219, I have a Pi HAT of 4 working fine. The setup script creates a JSON file describing each device. by default, INA219s are configured as loads, but you can manually edit the JSON file to set to source. DC loads/sources don't appear directly in VRM, only DCSystem as far as I can tell. but I have another project on gitlab, DCSystemAggregator. This will aggregate all the loads and sources into a single DCSystem for VRM.

0 Likes 0 ·
klaus-deiss avatar image klaus-deiss pulquero commented ·

Basically it is running. Very nice! More tomorrow.

Thank you.


ina-219-first.png

1 Like 1 ·
ina-219-first.png (51.9 KiB)
klaus-deiss avatar image
klaus-deiss answered ·

The installation basically went through, but there was one point that confused me.

When asked for the address of the INA219, I entered it multiple times, but the system didn't seem to accept the entry. Out of "desperation" I simply pressed return and the installation was carried out.


root@raspberrypi2:~# /data/dbus-i2c/setup
--- starting setup script v1.7.2

DBus support for I2C devices

Available actions:
  Install and activate (i)
  Reinstall (r) based on options provided at last install
  Uninstall (u) and restores all files to stock
  Quit (q) without further action
  Display setup log (s) outputs the last 100 lines of the log
  Display Log (l) outputs the last 100 lines of the log

Choose an action from the list above: i
Reconfigure? [y/n] y
If you have a BME280, enter its I2C address or press enter to finish: [0x76/0x77]
If you have a SHT3x, enter its I2C address or press enter to finish: [0x44/0x45]
If you have an INA219, enter its I2C address or press enter to finish: [0x40/0x41/0x42/0x44/0x45] 0x40
If you have an INA219, enter its I2C address or press enter to finish: [0x40/0x41/0x42/0x44/0x45] 40
If you have an INA219, enter its I2C address or press enter to finish: [0x40/0x41/0x42/0x44/0x45] 0x40
If you have an INA219, enter its I2C address or press enter to finish: [0x40/0x41/0x42/0x44/0x45] 40
If you have an INA219, enter its I2C address or press enter to finish: [0x40/0x41/0x42/0x44/0x45]
++ Installing DBUS I2C services
++ Install Python library velib_python (master) from https://github.com/pulquero/velib_python into /data/dbus-i2c/ext


However, checking the JSON file showed that the correct address was entered:


root@raspberrypi2:/data/setupOptions/dbus-i2c# cat device-ina219-1
{"module": "ina219_service", "class": "INA219DCLoadService", "bus": 1, "address": 64, "updateInterval": 1000}
root@raspberrypi2:/data/setupOptions/dbus-i2c#


So all good.

Maybe you should check the user's input (i.e. convert it to an integer, then ask again whether he really wants to use this value and then jump out of the function with a return). I took a quick look at the code there, shouldn't be difficult to do.


Otherwise everything went really well. I am extremely happy with my new DC system! Thank you very much.

By the way: How should I modify the JSON File to indicate that I'm using a DC-Source?

Klaus

2 comments
2 |3000

Up to 8 attachments (including images) can be used with a maximum of 190.8 MiB each and 286.6 MiB total.

pulquero avatar image pulquero commented ·

The multiple entry is to support multiple devices. I've improved the message to better reflect that. For a source, change

"class": "INA219DCLoadService"

to

"class": "INA219DCSourceService"

and restart.

1 Like 1 ·
sv-soleil avatar image sv-soleil pulquero commented ·

@Klaus Deiss so I was looking at your comment for insights but it tripped me up. When you entered 0x40 the first time it wrote to the file device-ina219-1

Then subsequent attempts created additional files device-ina219-2, etc.

Pressing return without an entry breaks out of the loop. So just pressing entry without an address won’t create the device-ina219-1 file, as I learned the hard way while wasting many hours.

So for anyone new trying this you need to enter the hex address then press enter.


0 Likes 0 ·
Robin K. avatar image
Robin K. answered ·

Thank you very much for your work on this @pulquero!

It works like a charm, install and setup succeeded on first try. Note that you have to restart the pi after adding a service to show the sensor in Remote Console and VRM - at least in my case I had to.


Thanks a ton!

2 |3000

Up to 8 attachments (including images) can be used with a maximum of 190.8 MiB each and 286.6 MiB total.

spatcho avatar image
spatcho answered ·

Greetings, It work with my SHT31 sensor, Thanks a lot ! I don't see the data through MQTT, is it a setting for this ? Or not implemented ?

6 comments
2 |3000

Up to 8 attachments (including images) can be used with a maximum of 190.8 MiB each and 286.6 MiB total.

pulquero avatar image pulquero commented ·
It should just work - if you can see it in dbus then it should automatically be exported to mqtt (I've setup home assistant to pull the temperature over mqtt).

- check the victron mqtt docs to ensure you are correctly sending keep alive messages.

- check the log for errors

cat /var/log/dbus-i2c/current


1 Like 1 ·
spatcho avatar image spatcho pulquero commented ·
Yep, the keep alive did it, thank you! Now, I have an air quality monitoring sensor (Adafruit PM2.5 air quality sensor) that I would like to be supported, is it something you are working on ? Or could I extends your package and what would be the best way ?
0 Likes 0 ·
pulquero avatar image pulquero spatcho commented ·
Do you have the model number or link to the product?
0 Likes 0 ·
spatcho avatar image spatcho pulquero commented ·

https://www.adafruit.com/product/4632

0 Likes 0 ·
pulquero avatar image pulquero spatcho commented ·
Create an issue on github and we'll take it from there.
0 Likes 0 ·
spatcho avatar image spatcho pulquero commented ·

Issue here https://github.com/pulquero/dbus-i2c/issues/4


0 Likes 0 ·
ralph avatar image
ralph answered ·

@pulquero It would be great to support in future a SCD40 - combined CO² and humidy sensor in your package helper.

thx

Ralph

1 comment
2 |3000

Up to 8 attachments (including images) can be used with a maximum of 190.8 MiB each and 286.6 MiB total.

pulquero avatar image pulquero commented ·
Raise an issue on github and I'll see what I can do.
1 Like 1 ·
sv-soleil avatar image
sv-soleil answered ·

I’m struggling with getting this running. After a full day of trying, I am stuck.

I had to manually create the device-BME-1 file as it wasn’t created using the startup.

But it seems the problem is that there is no module named “smbus2”

Any advice? @pulquero

img-7144.jpeg

img-7135.jpegimg-7138.jpegImage Caption


img-7136.jpeg


img-7135.jpeg (226.3 KiB)
img-7138.jpeg (117.6 KiB)
img-7136.jpeg (144.3 KiB)
img-7144.jpeg (306.1 KiB)
2 comments
2 |3000

Up to 8 attachments (including images) can be used with a maximum of 190.8 MiB each and 286.6 MiB total.

pulquero avatar image pulquero commented ·
Try running the setup script (/data/dbus-i2c/setup) from the shell, that should download the missing dependencies.
0 Likes 0 ·
sv-soleil avatar image sv-soleil pulquero commented ·

Thank you. After a bit of fiddling and fumbling, I got everything working.


For the BME280, the key step was to enter the hex address 0x76 at the prompt during setup and not just pressing return. This then gets saved to the device-bme280-1 file as a decimal number 118.


img-7236.jpeg


It finally shows up on the remote console:


img-7238.jpeg

Temp, humidity and pressure showing up on VRM

img-7239.jpeg

and NodeRed


0 Likes 0 ·
img-7236.jpeg (155.0 KiB)
pulith avatar image
pulith answered ·

how to check if i2c is activated. what is the command line to check this. i have a rasp 4b. thanks

4 comments
2 |3000

Up to 8 attachments (including images) can be used with a maximum of 190.8 MiB each and 286.6 MiB total.

pulquero avatar image pulquero commented ·
i2cdetect -y 1
1 Like 1 ·
pulith avatar image pulith pulquero commented ·

i have been tring to install the fan from waveshare with no luck. Fan HAT - Waveshare Wiki (link) can you please help me thanks

0 Likes 0 ·
pulquero avatar image pulquero pulith commented ·
Currently, there is no support for this HAT - an i2c driver needs to be specifically written for it. Create a feature request on github outlining your requirements.
1 Like 1 ·
pulith avatar image pulith pulquero commented ·
0 Likes 0 ·