article

wkirby avatar image
wkirby posted

My cabinet build.

Inspired by @Markus 19" cabinet build, I thought I'd build one for myself.
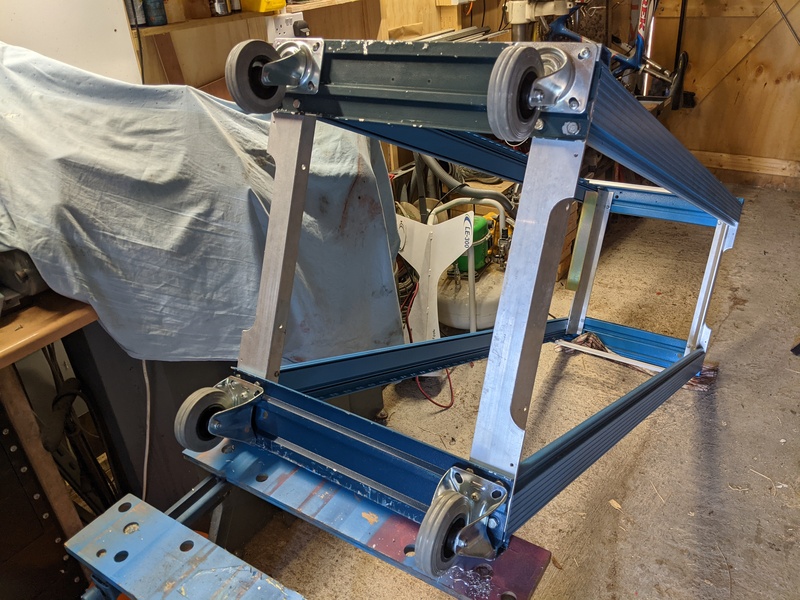
I already have a 19" rack which used to be in a now decommissioned television station.

I decided to paint the old rack and mount some wheels to it.

pxl-20210213-095634523resized.jpg

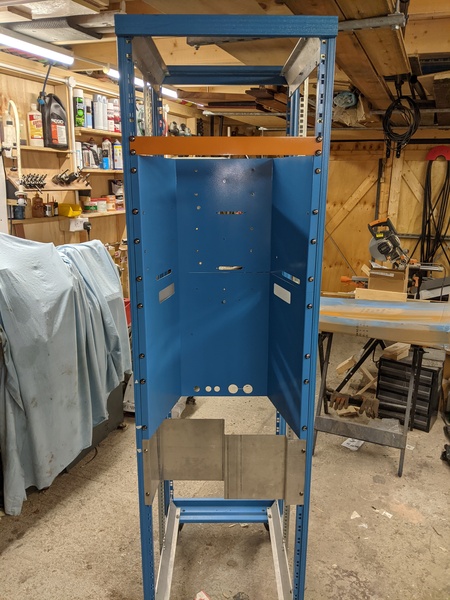
Then I planned and fabricated some mounting bays for the equipment to me mounted to.

pxl-20210220-155002497resized.jpg

Once I had finished the drilling and milling operations I set about painting the parts.
After some careful consideration, I settled on a certain blue colour that I really like. The paint code is RAL5012 if anyone is interested.

pxl-20210223-211724914resized.jpg

Next, check that the parts fit into the 19" frame.

pxl-20210224-190452779resized.jpg

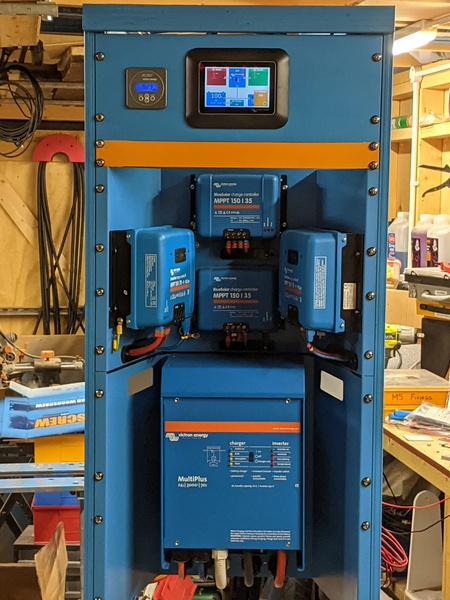
Now the fun begins with all the wiring.
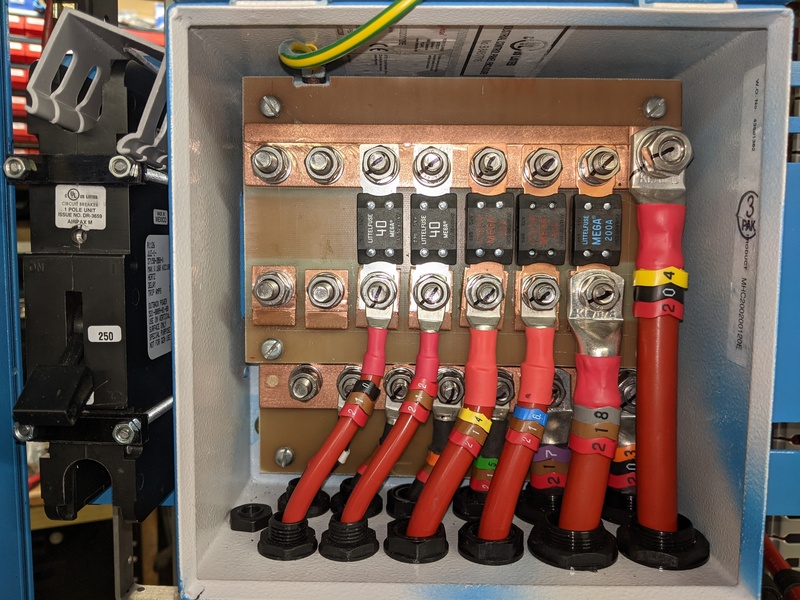
I made up a fuse box and mounted it at the rear. Then I started terminating all the high current cables in here. Mark your fasteners so that you know that they have been torqued correctly. This helps you to sleep easily during the night.

pxl-20210302-222442436resized.jpg

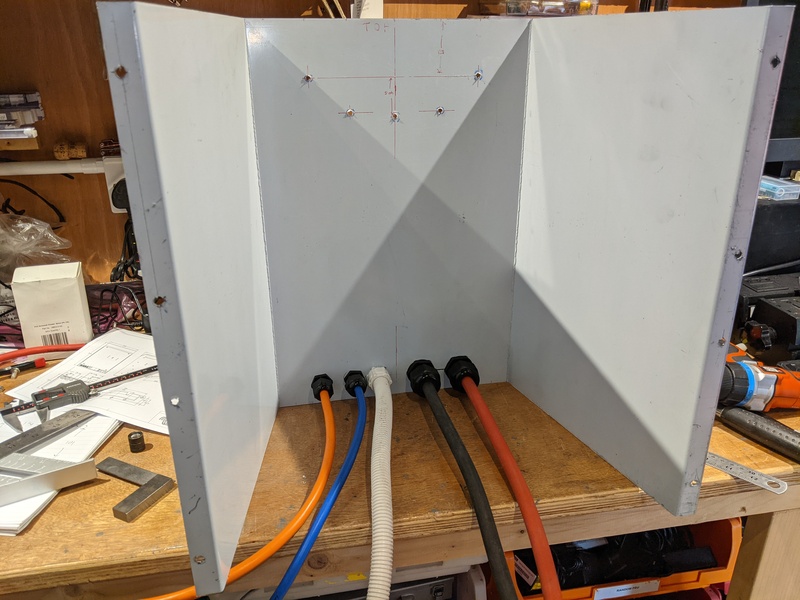
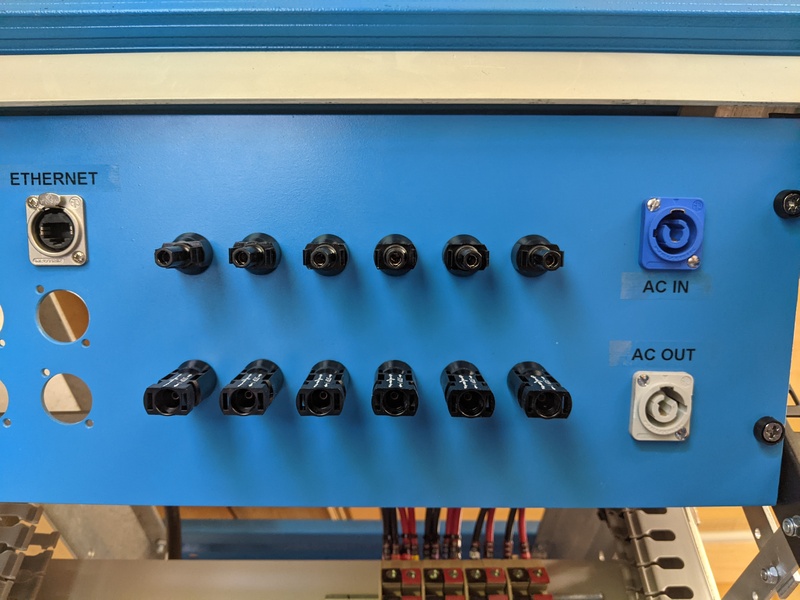
Also made up a rear panel for all the external connections to connect to

pxl-20210301-144021337resized.jpg

Some PV strings are combined onto these terminal blocks. Other strings pass straight through the terminal blocks.

pxl-20210303-194407909resized.jpg

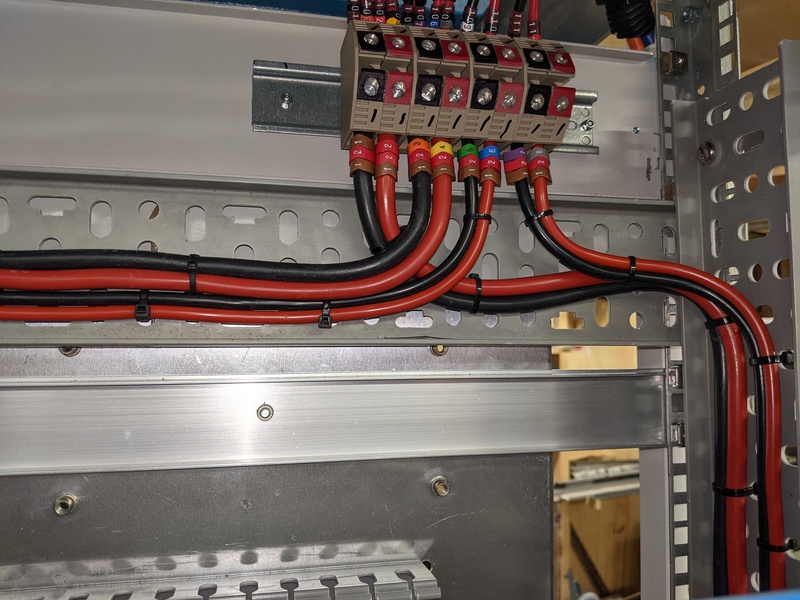
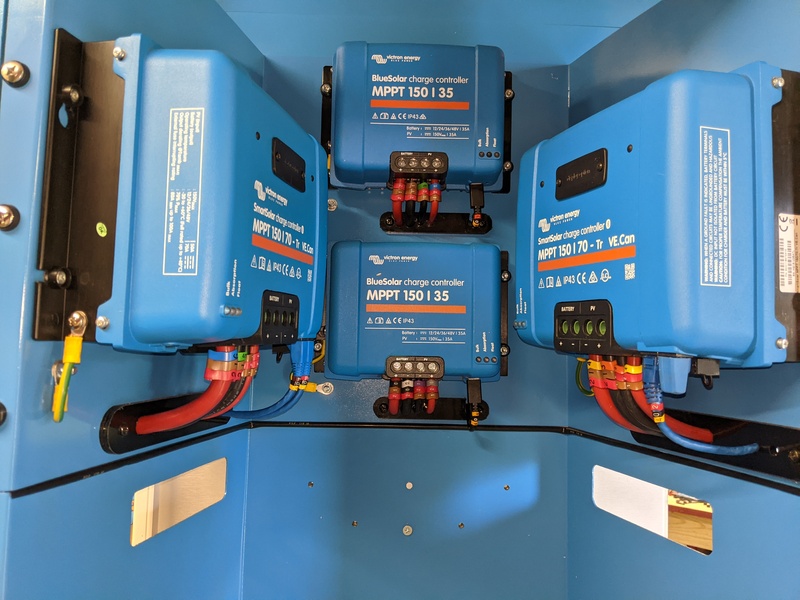
Cables from the PV terminal blocks then go to their respective charge controller positions.

pxl-20210305-135504959resized.jpg

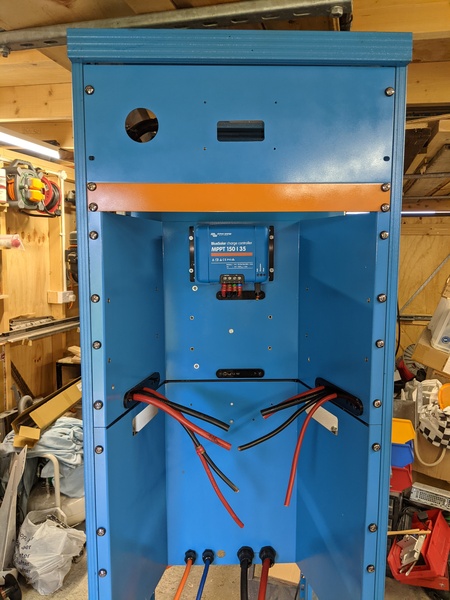
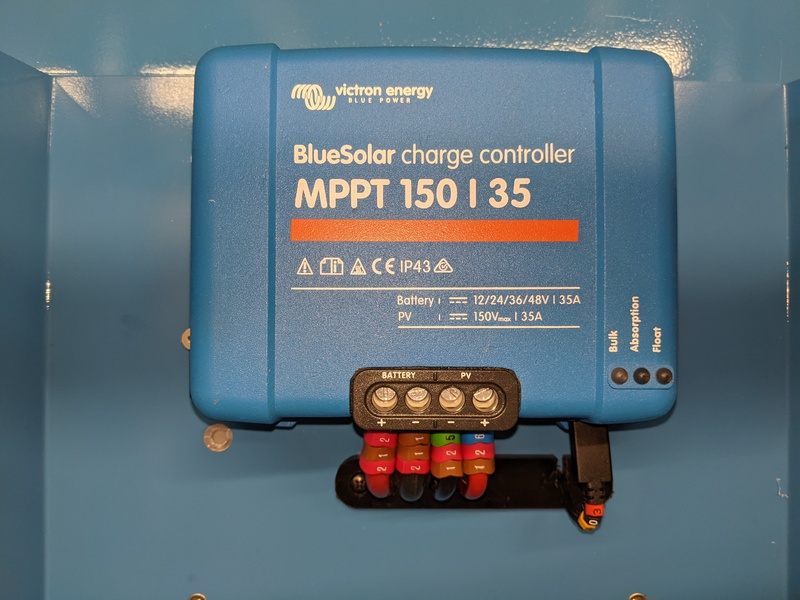
Then start to wire up the charge controllers.

pxl-20210305-132520450resized.jpg

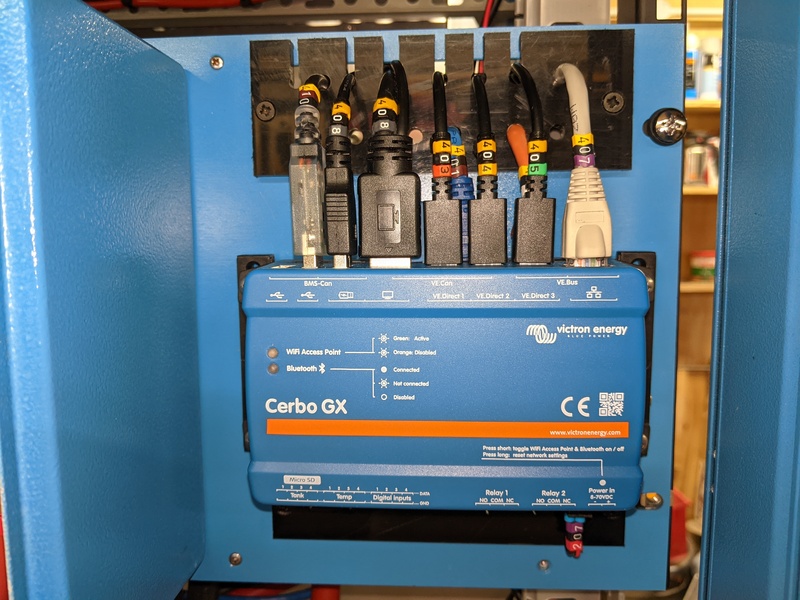
I mounted the CerboGX at the rear also and ran the data cabling over to it.

pxl-20210306-184805821resized.jpg

Here. all of the charge controllers are in place. I have several arrays dotted about. Two south ones, one east and one west. Each of those arrays gets its own controller.

pxl-20210307-130500444resized.jpg

Now on to mounting the MultiPlus.

pxl-20210307-174423667resized.jpg

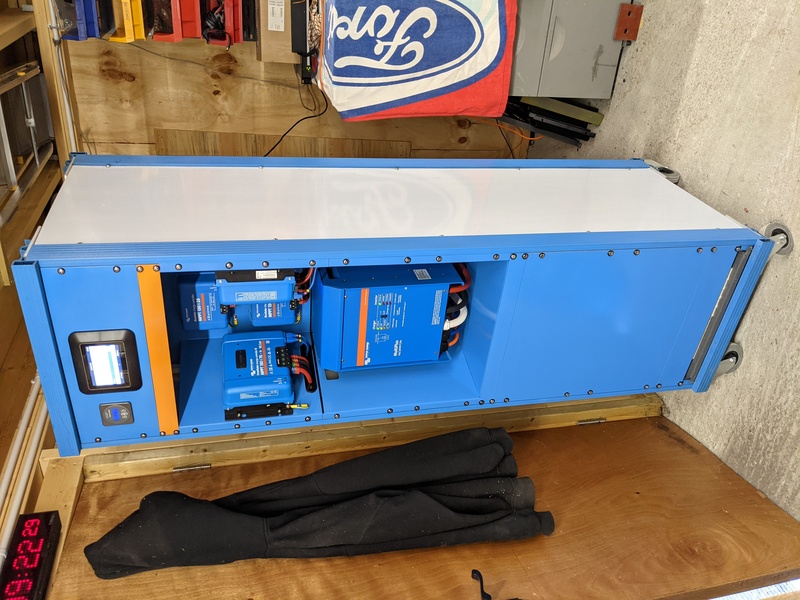
Now all of the components are installed, give it a bit of juice to test it all lights up as it should.

pxl-20210307-194922475resized.jpg

Then button it up, put the blank panels and sides on to finish it off.

pxl-20210321-171618557resized.jpg

system design
6 comments
2 |3000

Up to 8 attachments (including images) can be used with a maximum of 190.8 MiB each and 286.6 MiB total.

Eduard avatar image Eduard commented ·

Well done with your project, it is very neat and the blue colour add value.

Tell me how do you think about ventilation if the system is running at full power?

0 Likes 0 ·
wkirby avatar image wkirby ♦♦ Eduard commented ·

The equipment is keeping very cool. If it is sunny, then my MultiPlus will be going 100% for hours and it is quite happy with this. The warm air from the MultiPlus is directed through the big holes in the side walls which are aligned with the exhaust holes of the MultiPlus.

The MPPTs are running very cool, but they don't have see maximum power yet.

There are temperature sensors at the top and bottom of the cabinet also.

0 Likes 0 ·
Warwick Bruce Chapman avatar image Warwick Bruce Chapman commented ·

"After some careful consideration, I settled on a certain blue colour that I really like."

lol.

0 Likes 0 ·
markus avatar image markus ♦♦ commented ·

Well done Warwick.

I love the technical beauty of this cabinet.

Really good work, you can be proud of!

0 Likes 0 ·
kogir avatar image kogir commented ·

Your build looks incredible! What number labels did you use to identifying the cables? I’d love to use them in my next project.

0 Likes 0 ·
wkirby avatar image wkirby ♦♦ kogir commented ·

I used Hellerman Tyton slide on cable markers.

0 Likes 0 ·

Article

Contributors

WKirby contributed to this article

Related Articles