Thanks to @nickdb, @derrick thomas and @Anders, I was able to get @nickdb's "parallel" script running flawlessly in Node Red, even though I knew nothing about Node Red.
The script saved me a mountain of cash as I would have had to buy additional hardware otherwise. The "parallel" script is available here: https://community.victronenergy.com/questions/273710/nodered-show-parallel-system-stats.html?childToView=276405#answer
Either package will do.
As a beginner with Node Red, I found @Groningen's question very important. Where does someone who knows nothing about Node Red start? The original question is here: https://community.victronenergy.com/questions/214791/node-red-for-beginners-and-beyond-to-get-you-start.html
The resources listed in that thread are useful but they assume some knowledge of Node Red or they are very generic. So I wrote up this "how-to" guide.
I did every single thing over the Internet, so VRM was running. My steps might also work without an Internet connection with the necessary modifications.
As background, I have the following Victron gear:
1. One 250/100 and two 250/70 MPPTs connected to three arrays of 11.5 kWh capacity.
2. One Cerbo GX.
3. Two Quattros of 10,000 VA each running in parallel.
4. BSL Batt batteries of about 800 Ah.
All items were running the latest firmware as of 1 April 2024. The system was running perfectly with VRM online.
I activated Node Red just to run the parallel script and out of pure curiosity, decided to run MQTT Explorer. So examples in this tutorial use that script and that client.
Here are the steps I took as a pure Node Red beginner:
1. Installed Venus OS Large on my Cerbo GX through VRM remote console per Victron online manual here: https://www.victronenergy.com/live/venus-os:large
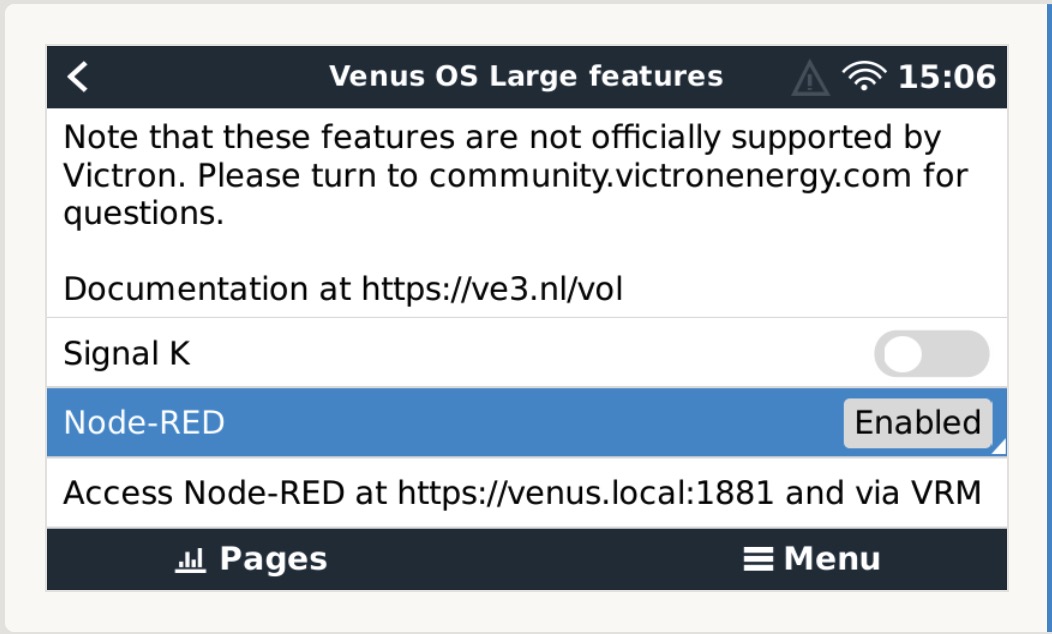
2. Activated Node Red on Cerbo through remote console. Mosquito or equivalent program is needed by Node Red but it is automatically included and activated on Venus OS Large; no need to install it separately.
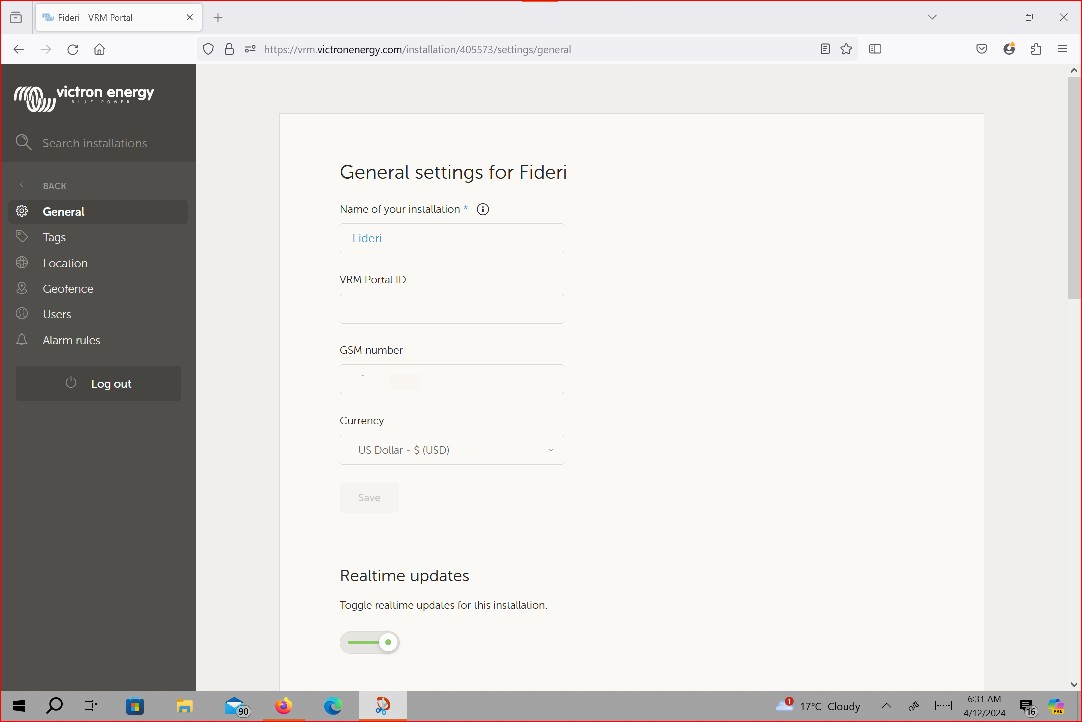
3. Got my VRM ID. It's on VRM and on your GX device. On VRM, it's under settings>general. Refer to screenshot.
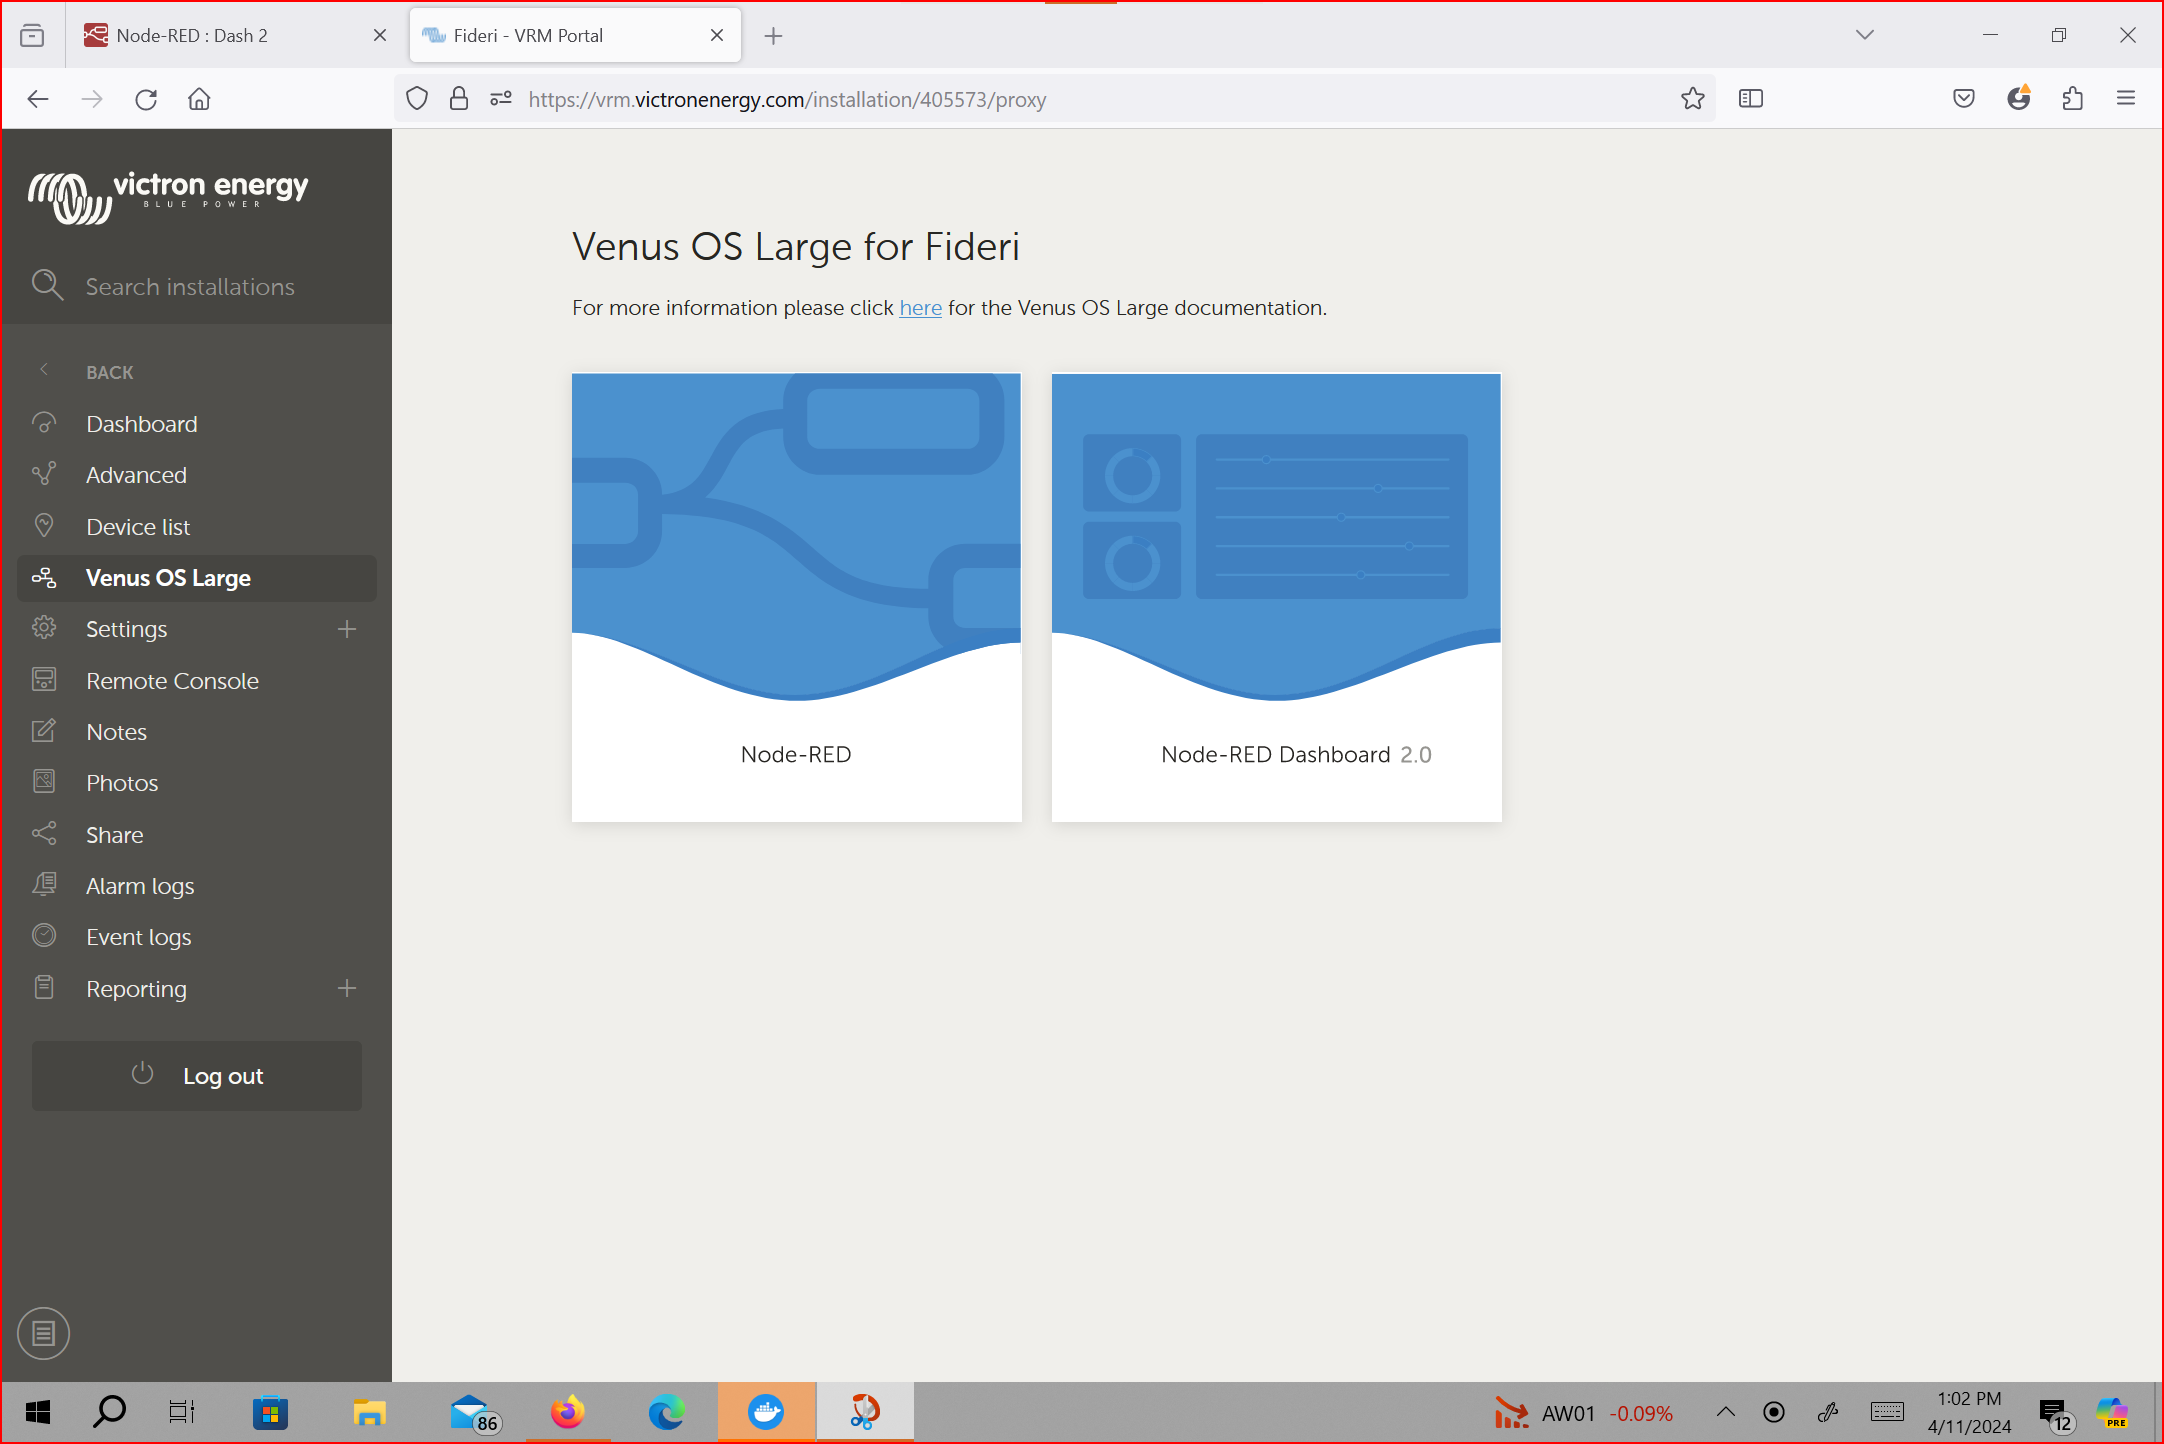
4. Clicked on Venus OS Large on the VRM menu to go to Node Red. Refer to screenshot. At this point, Node Red's dashboard wasn't yet installed. So its icon wasn't there.
5. Followed the Node Red link in VRM and a normal Node Red editor opened.
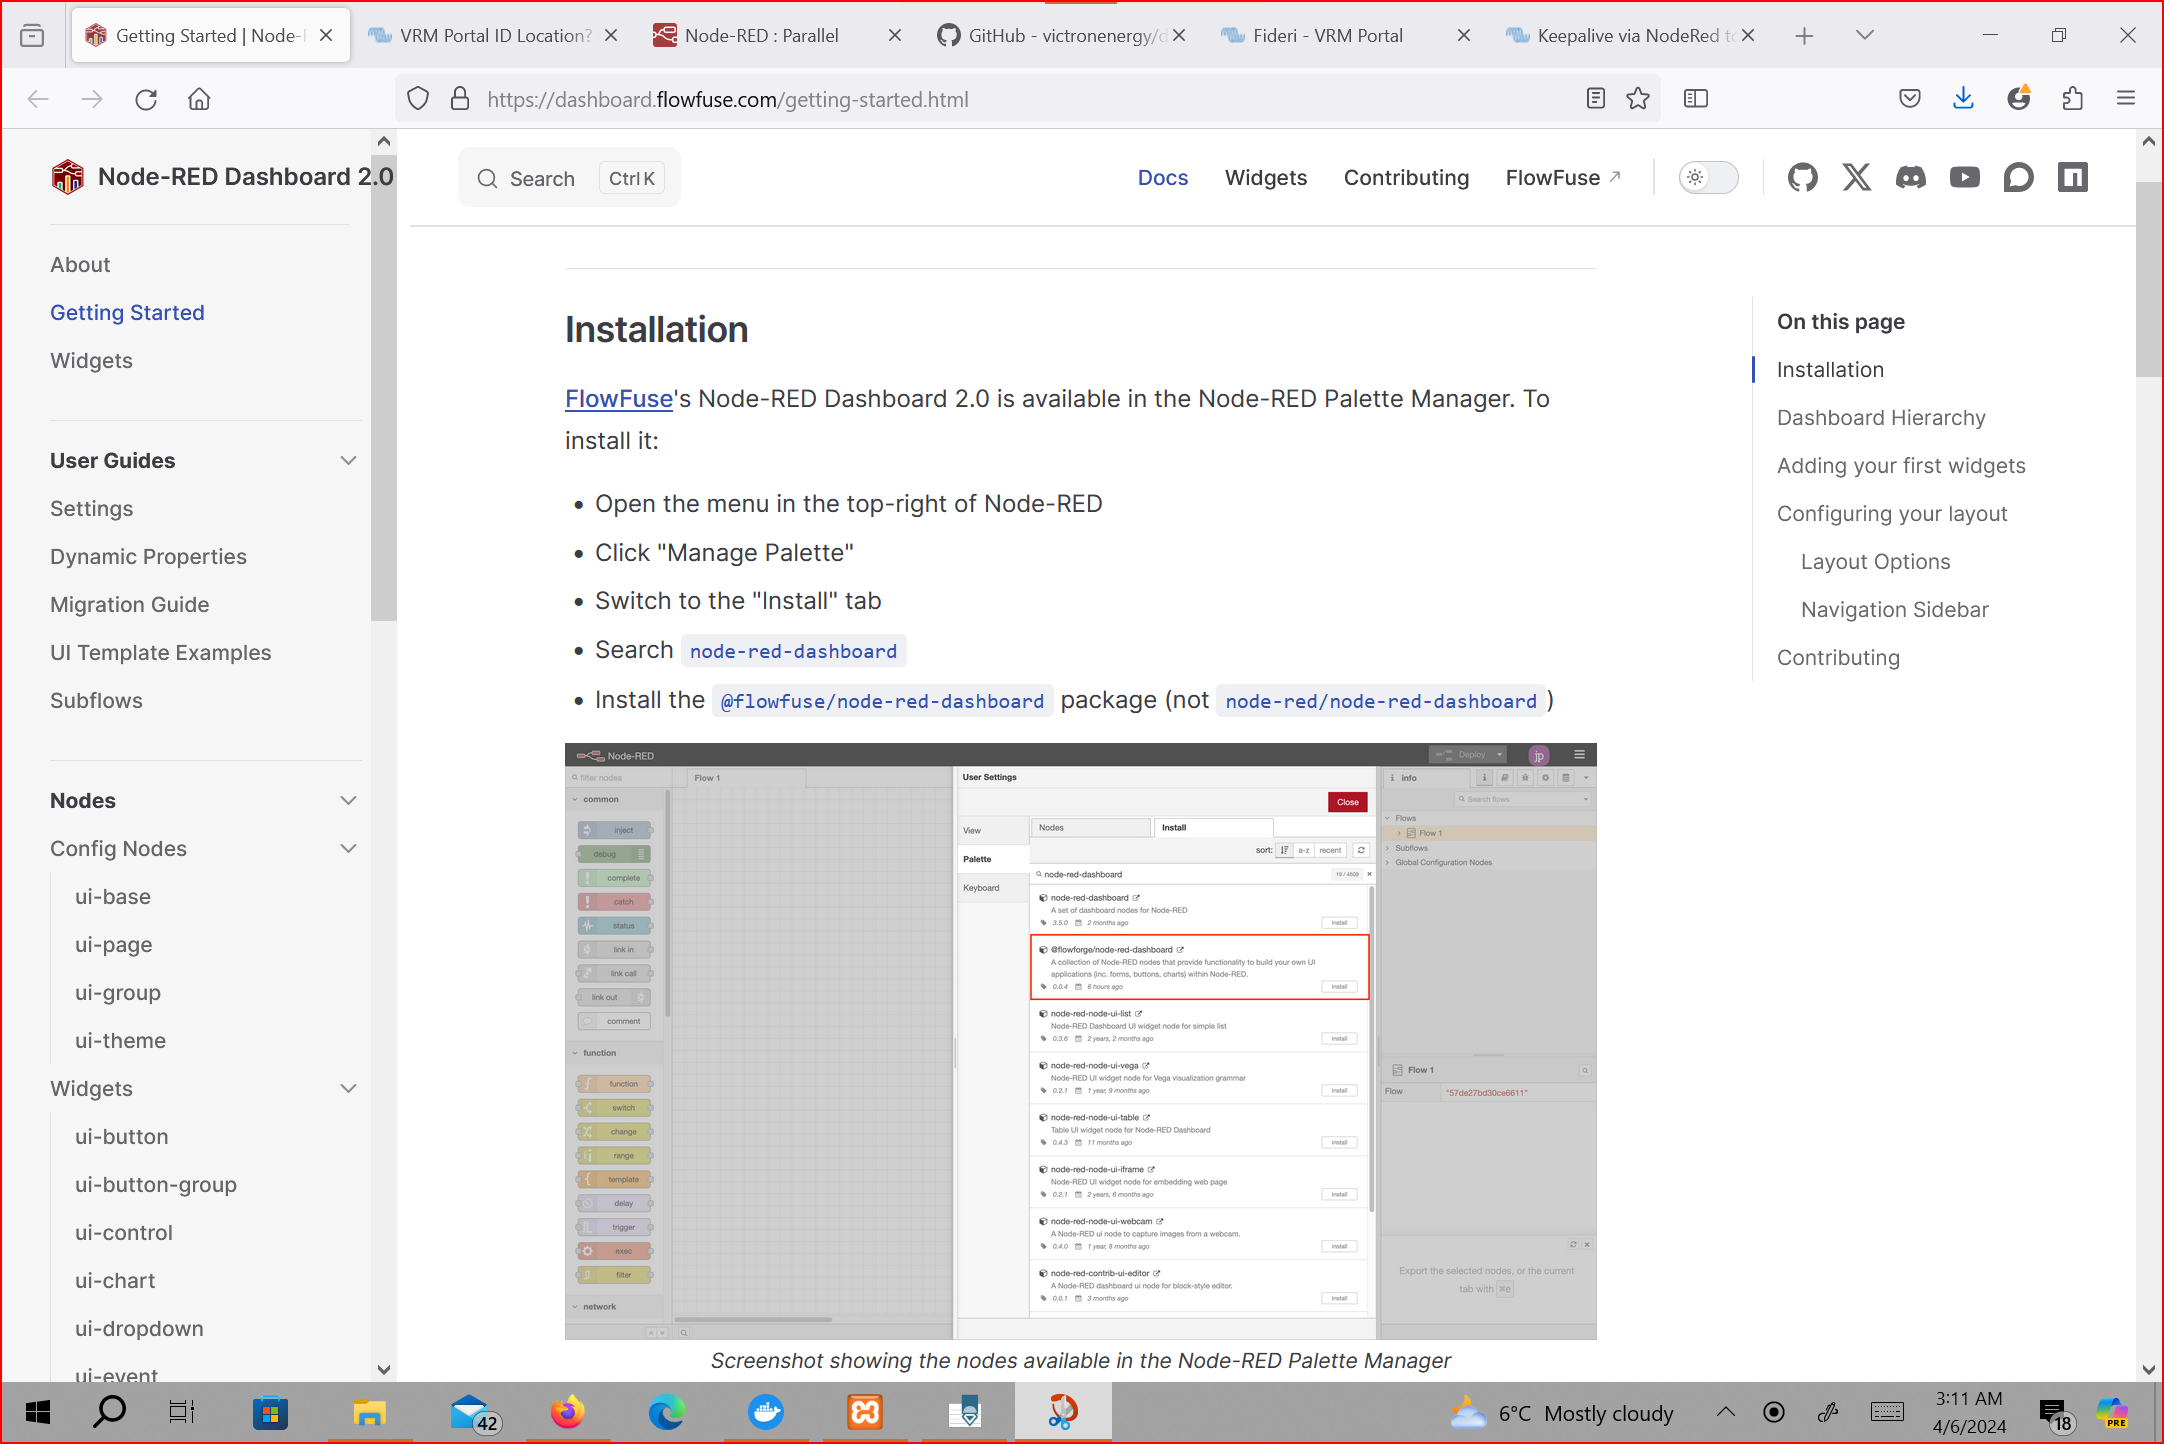
6. Installed Node Red's dashboard 2.0 (https://dashboard.flowfuse.com/) through the Node Red editor's Pallete manager. See screenshot.
7. Went back to VRM and there was now a dashboard 2.0 link, just next to the editor's link. Refer to the screenshot in step 4. Note that the more Node Red dashboards you install, the more links Venus generates to those dashboards.
8. You edit your stuff in the Node Red editor window and after saving your work ("deploy" in Node Red's speak), you view the results of your labour in the relevant dashboard window (Node Red dashboard 2.0 in this case).
9. Victron has many "nodes" pre-installed on the editor ready for use. See Victron's screenshots here: https://www.victronenergy.com/live/venus-os:large
10. Having installed Node Red's dashboard 2.0, when clicking on its link in VRM, I got an empty page with the error "cannot GET /dashboard" explained very well by @Anders in this post: https://community.victronenergy.com/questions/265726/the-new-node-red-dahsbord-20-cannot-get-dashboard.html?childToView=265736#answer-265736
11. Using @Anders' trick contained in the same post, I solved the problem by creating a dummy "flow" that does absolutely nothing using dashboard 2.0's features on the editor.
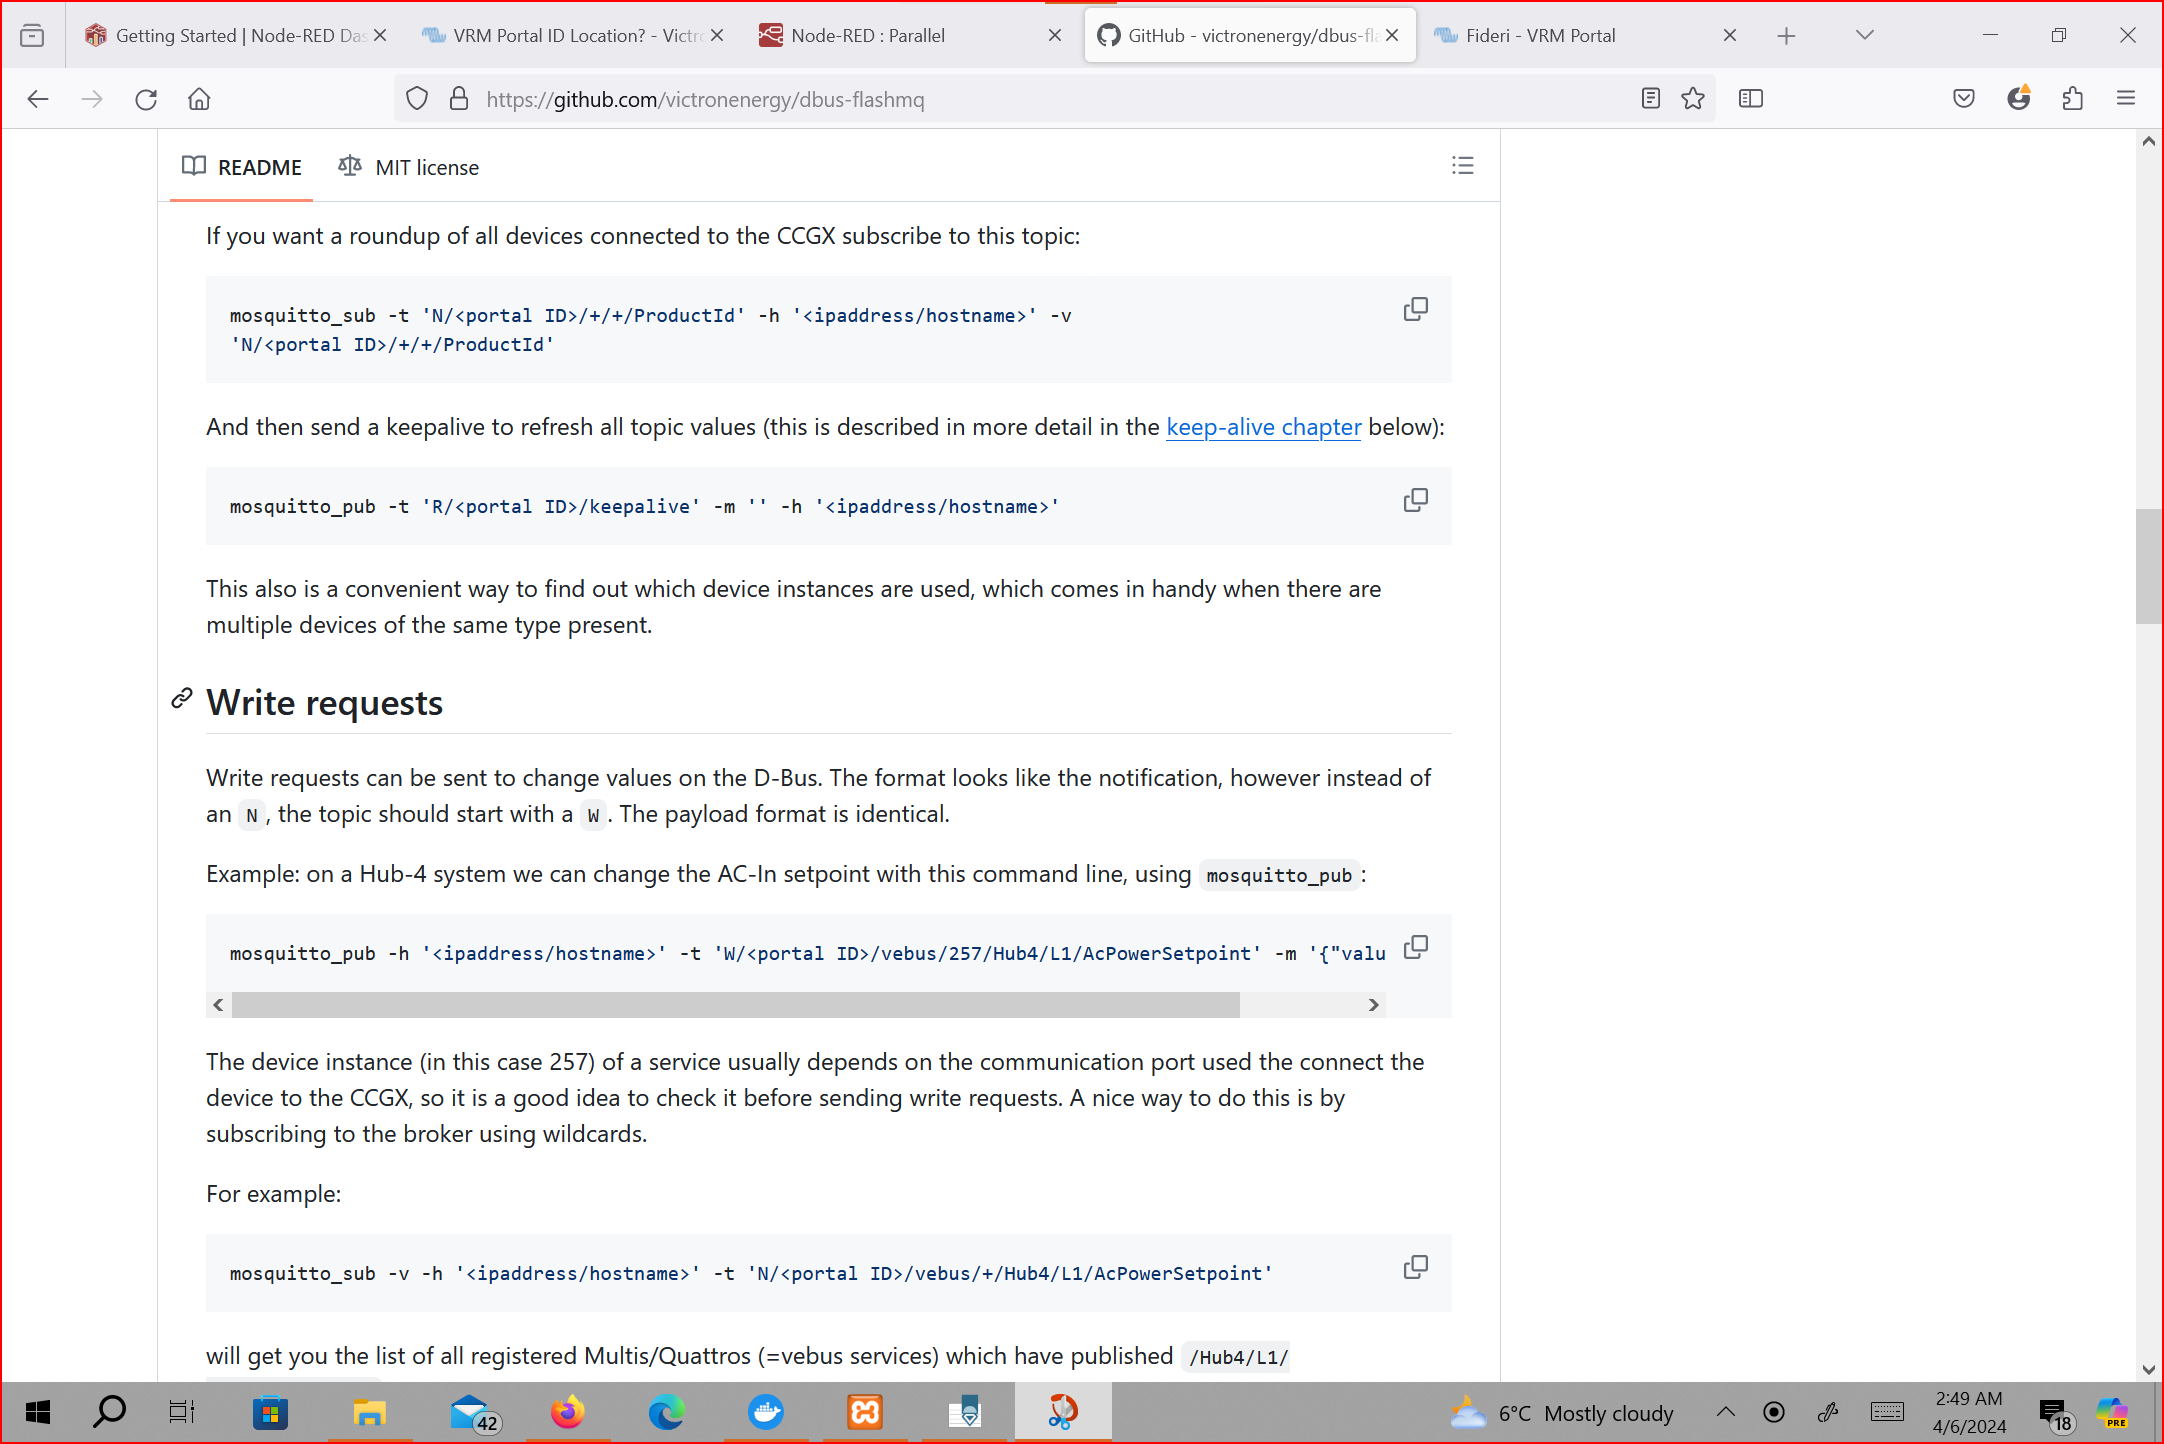
12. Using my favourite code editor's "search and replace" feature, I replaced the VRM ID contained in @nickdb's script. A one Plonkster's comment in an external post was very useful especially the part explaining the structure of Victron "topics" (MQTT speak)/data paths. The thread is here: https://energytalk.co.za/t/mqtt-explorer-help-please/1173/8
Tip: The VRM ID is the cryptic string that follows the letter "R", "W" or "N" without the slashes.
13. I also replaced the Cerbo's IP address. You can find your unique IP address on your GX device or just use the standard "localhost" or its IP number of "127.0.0.1".
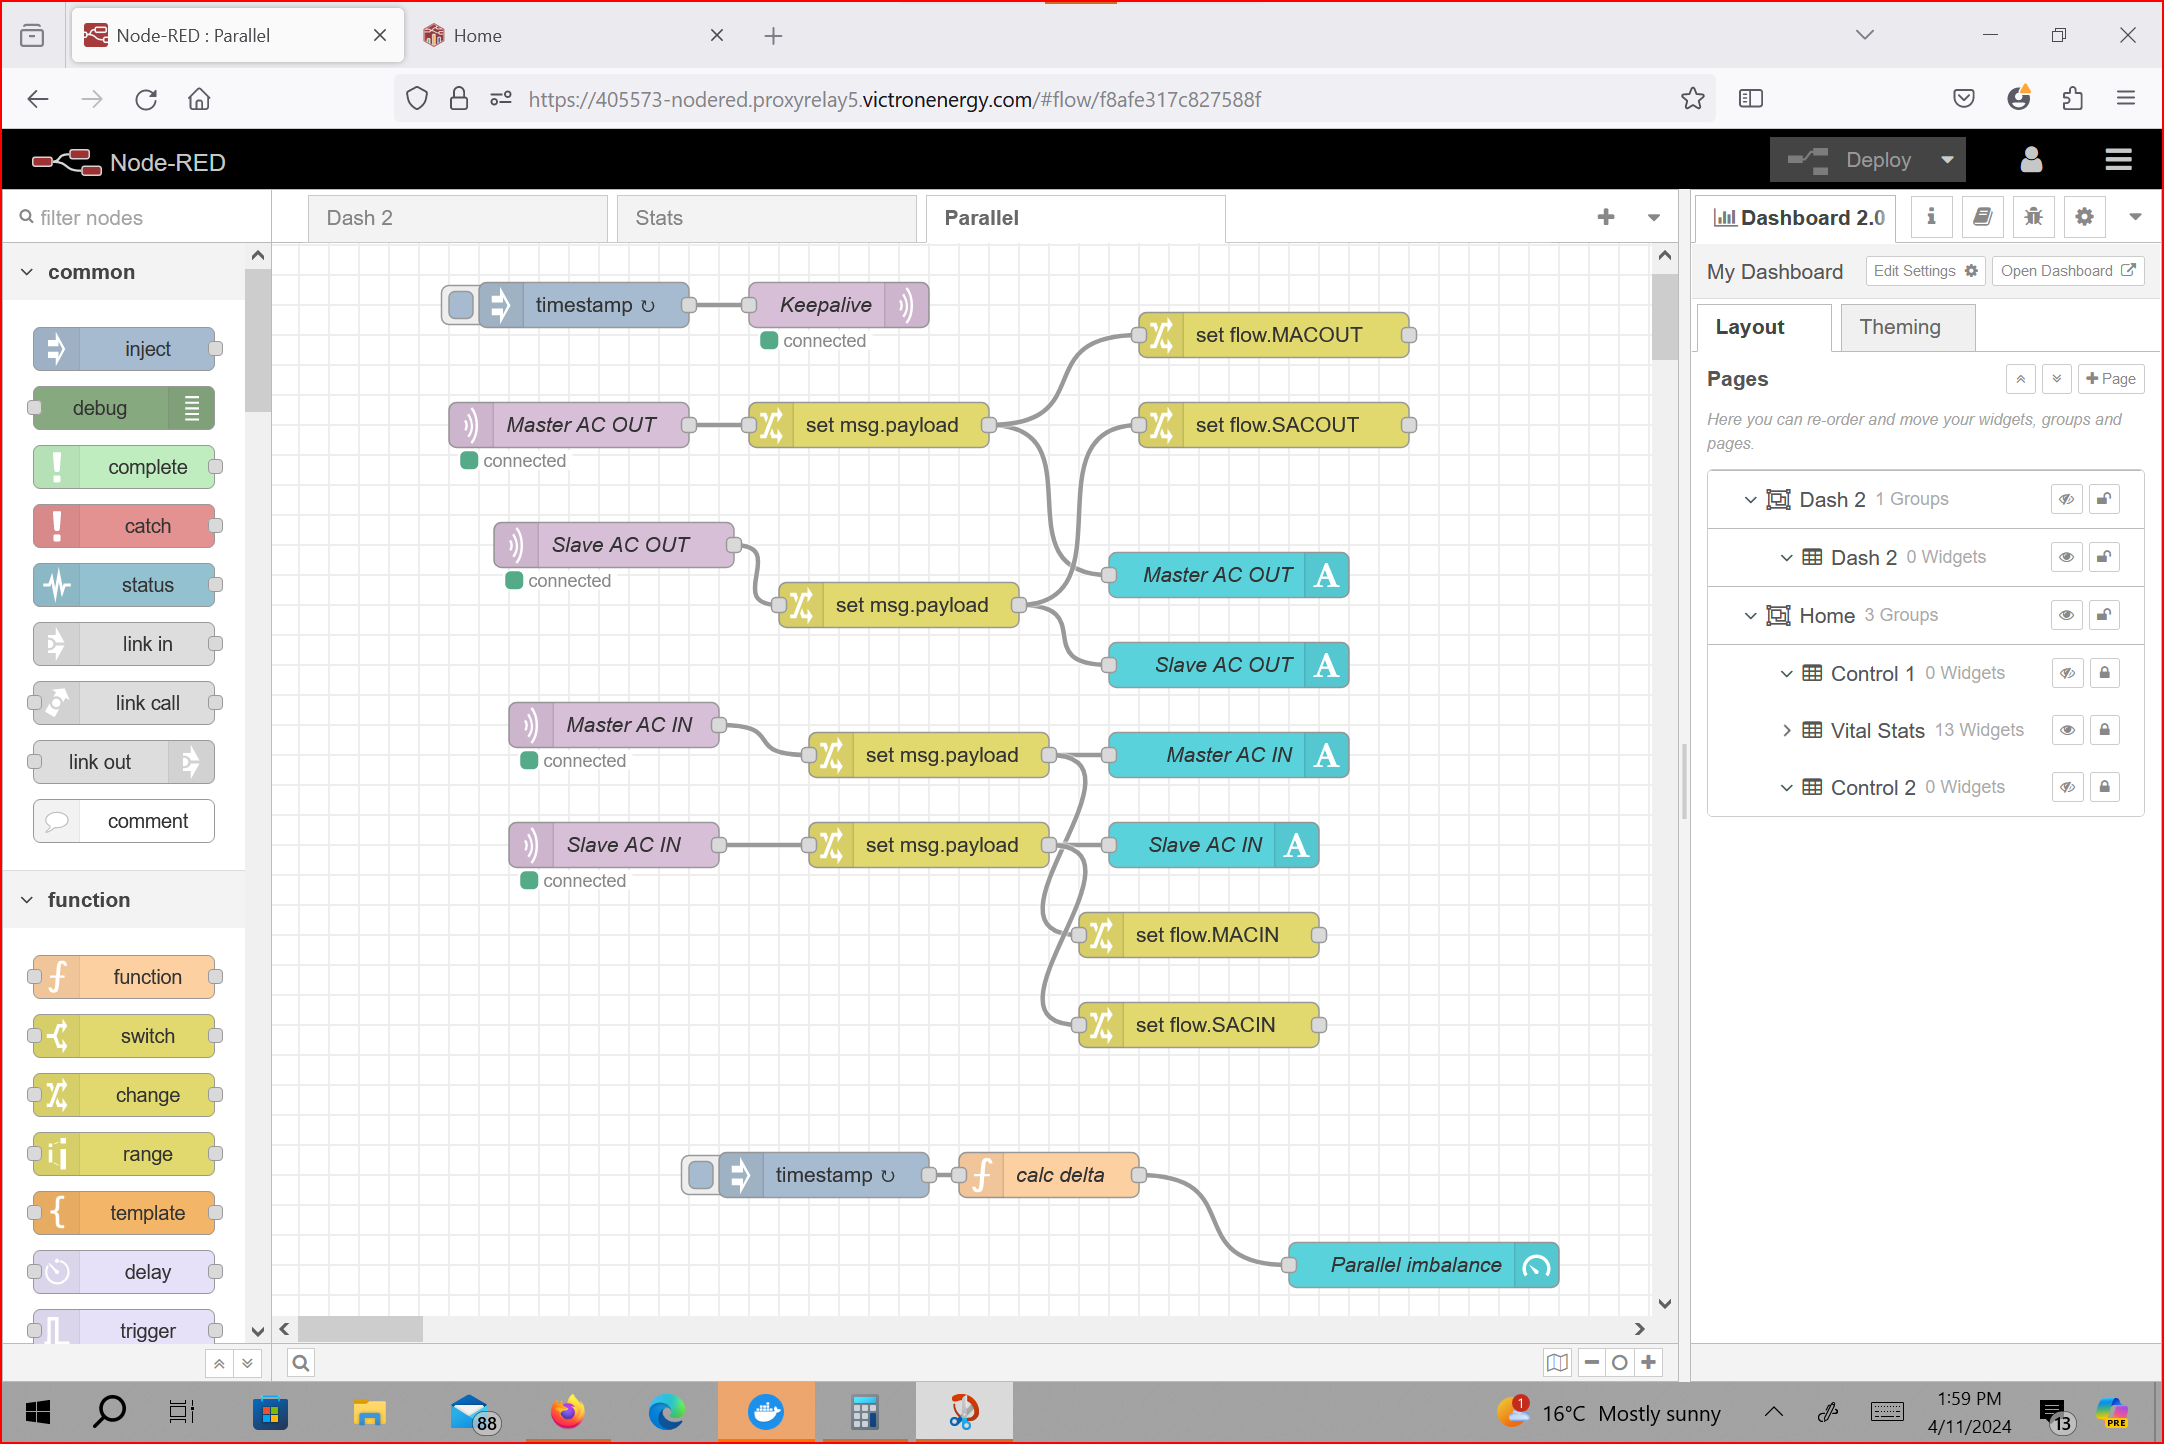
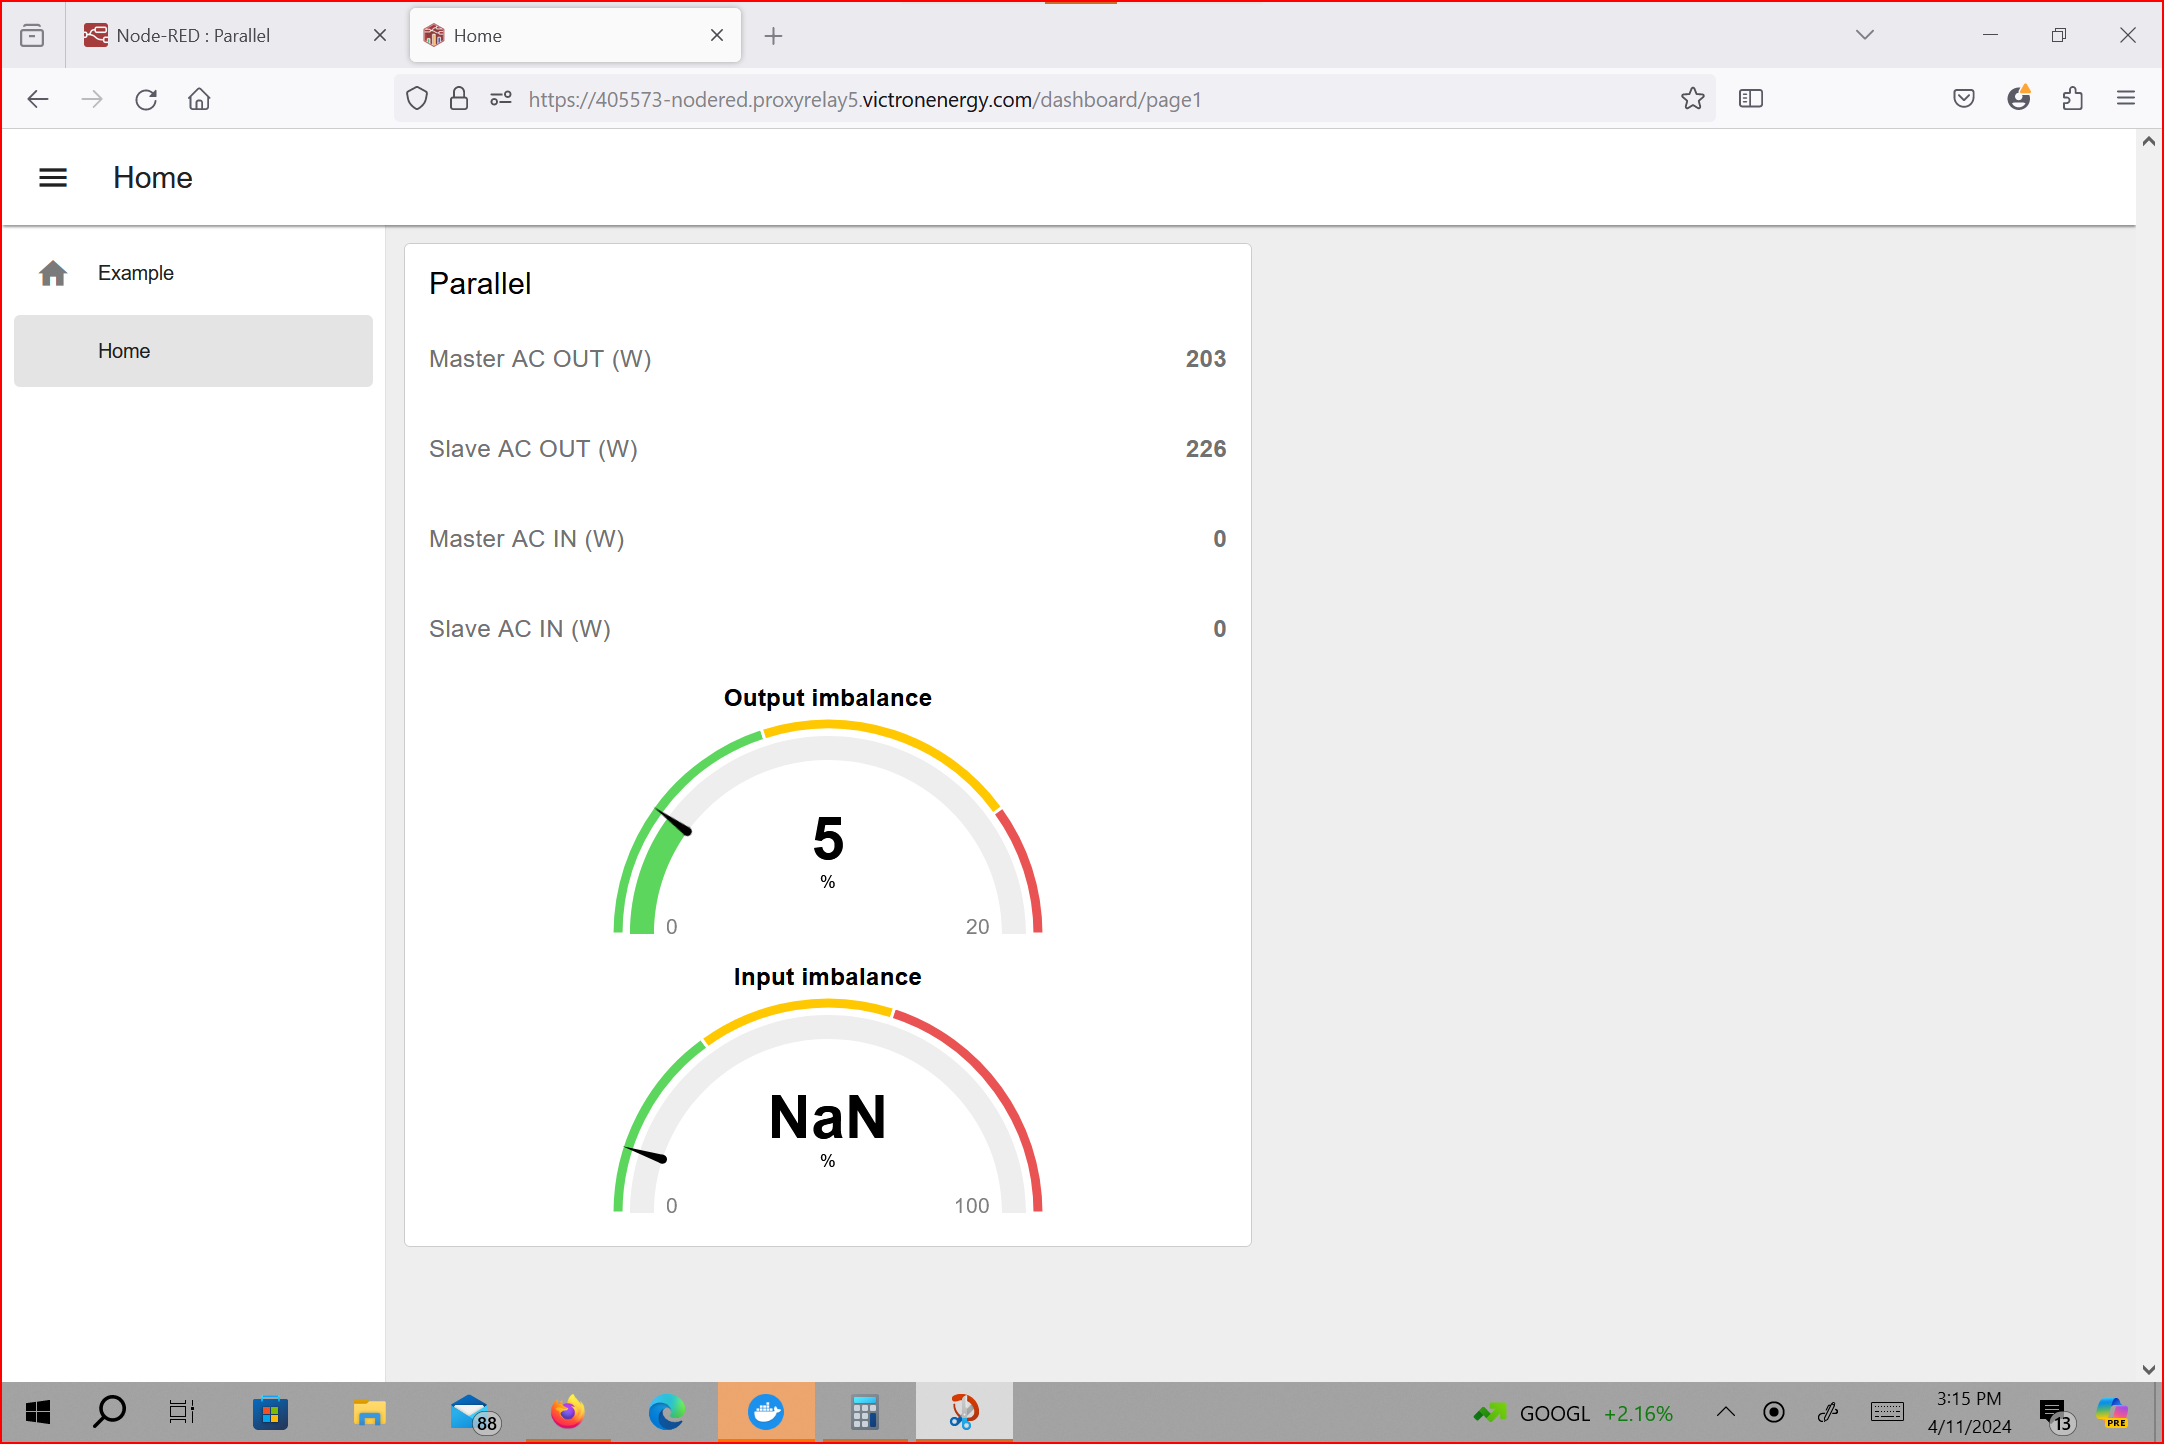
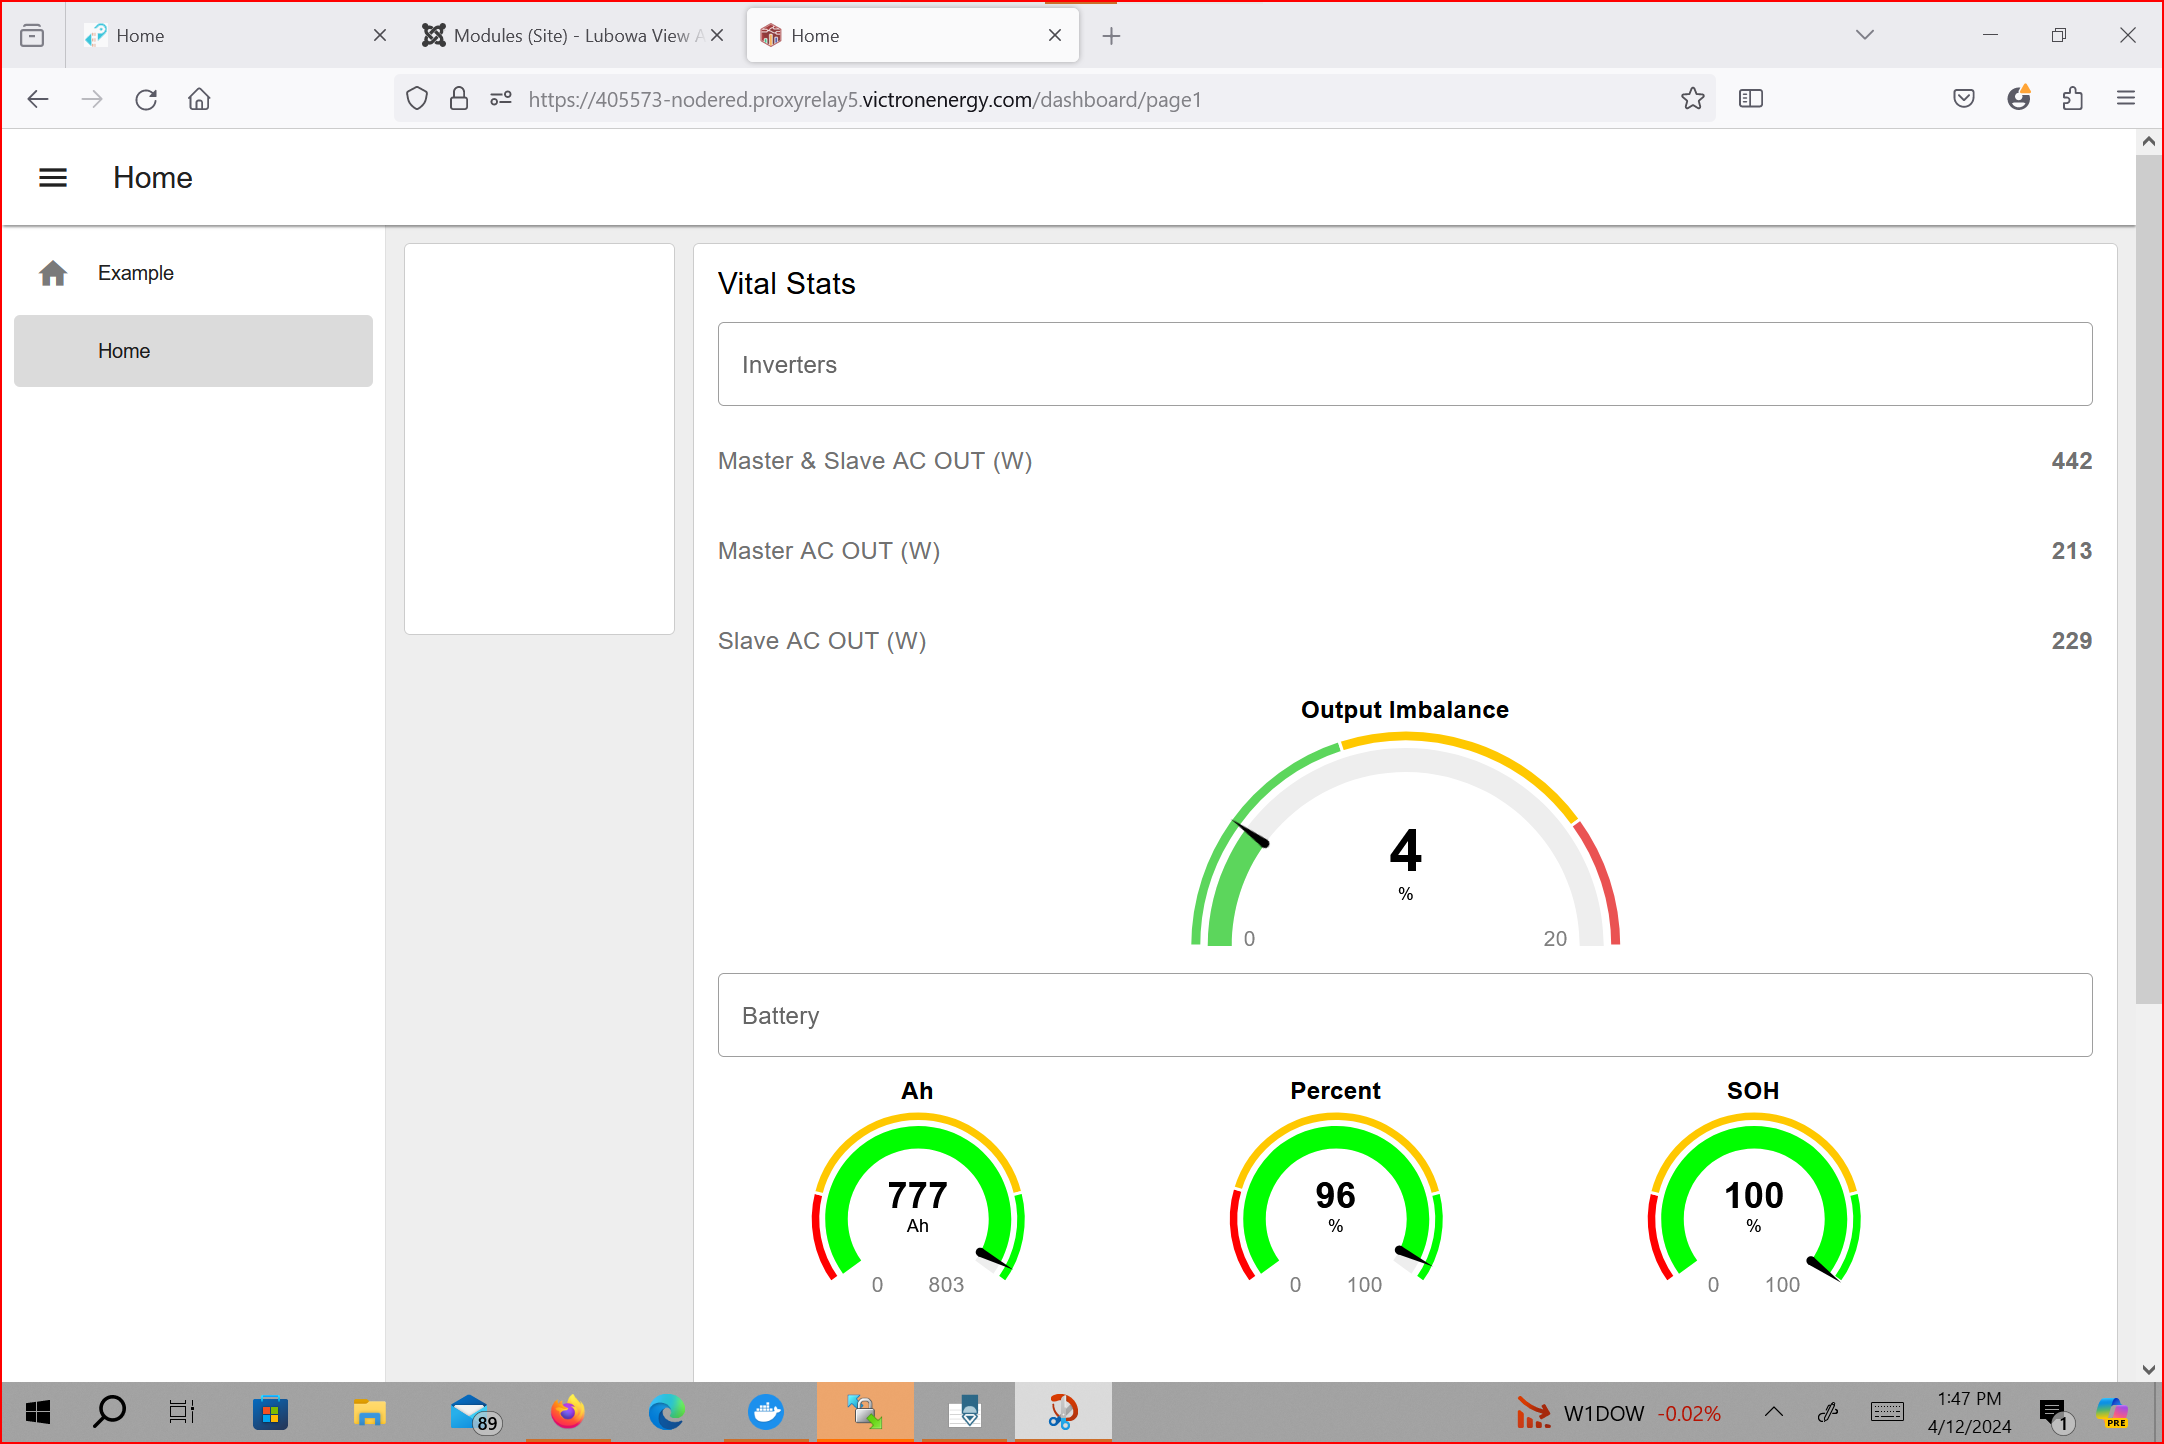
14. Imported the parallel script in Node Red's editor. See screenshots of how the script looks in the editor and on the dashboard. I don't have any AC-in, so some things read "0" or "NaN" as expected. I customized the look to suit my needs (see screenshot) but this might be unnecessary for you.
I relied heavily on the Victron manual here: https://www.victronenergy.com/live/venus-os:large
However, I found some weaknesses:
1. The manual is not self-contained and has no out of the box full examples. You have to forage the Internet in addition.
2. It is not made clear that a dashboard is required. This is a serious omission. In my opinion, a working dashboard should be bundled with Venus OS Large or at least included in the manual as a "step".
3. The manual is very repetitive, a poor "cut and paste" job. There are parts that appear more than once, word for word.
4. The manual explicitly states that the CCGX is not compatible with Node Red but Victron's own documents on GitHub use the CCGX for explanations and examples. See screenshot*.
The steps below are completely unnecessary unless you want to use an MQTT client like the popular MQTT Explorer. In my case, I just wanted to see the "topics" (data points) that Victron broadcasts over MQTT just out of curiosity.
I followed the instructions in this post, complete with screenshots: https://energytalk.co.za/t/mqtt-explorer-help-please/1173
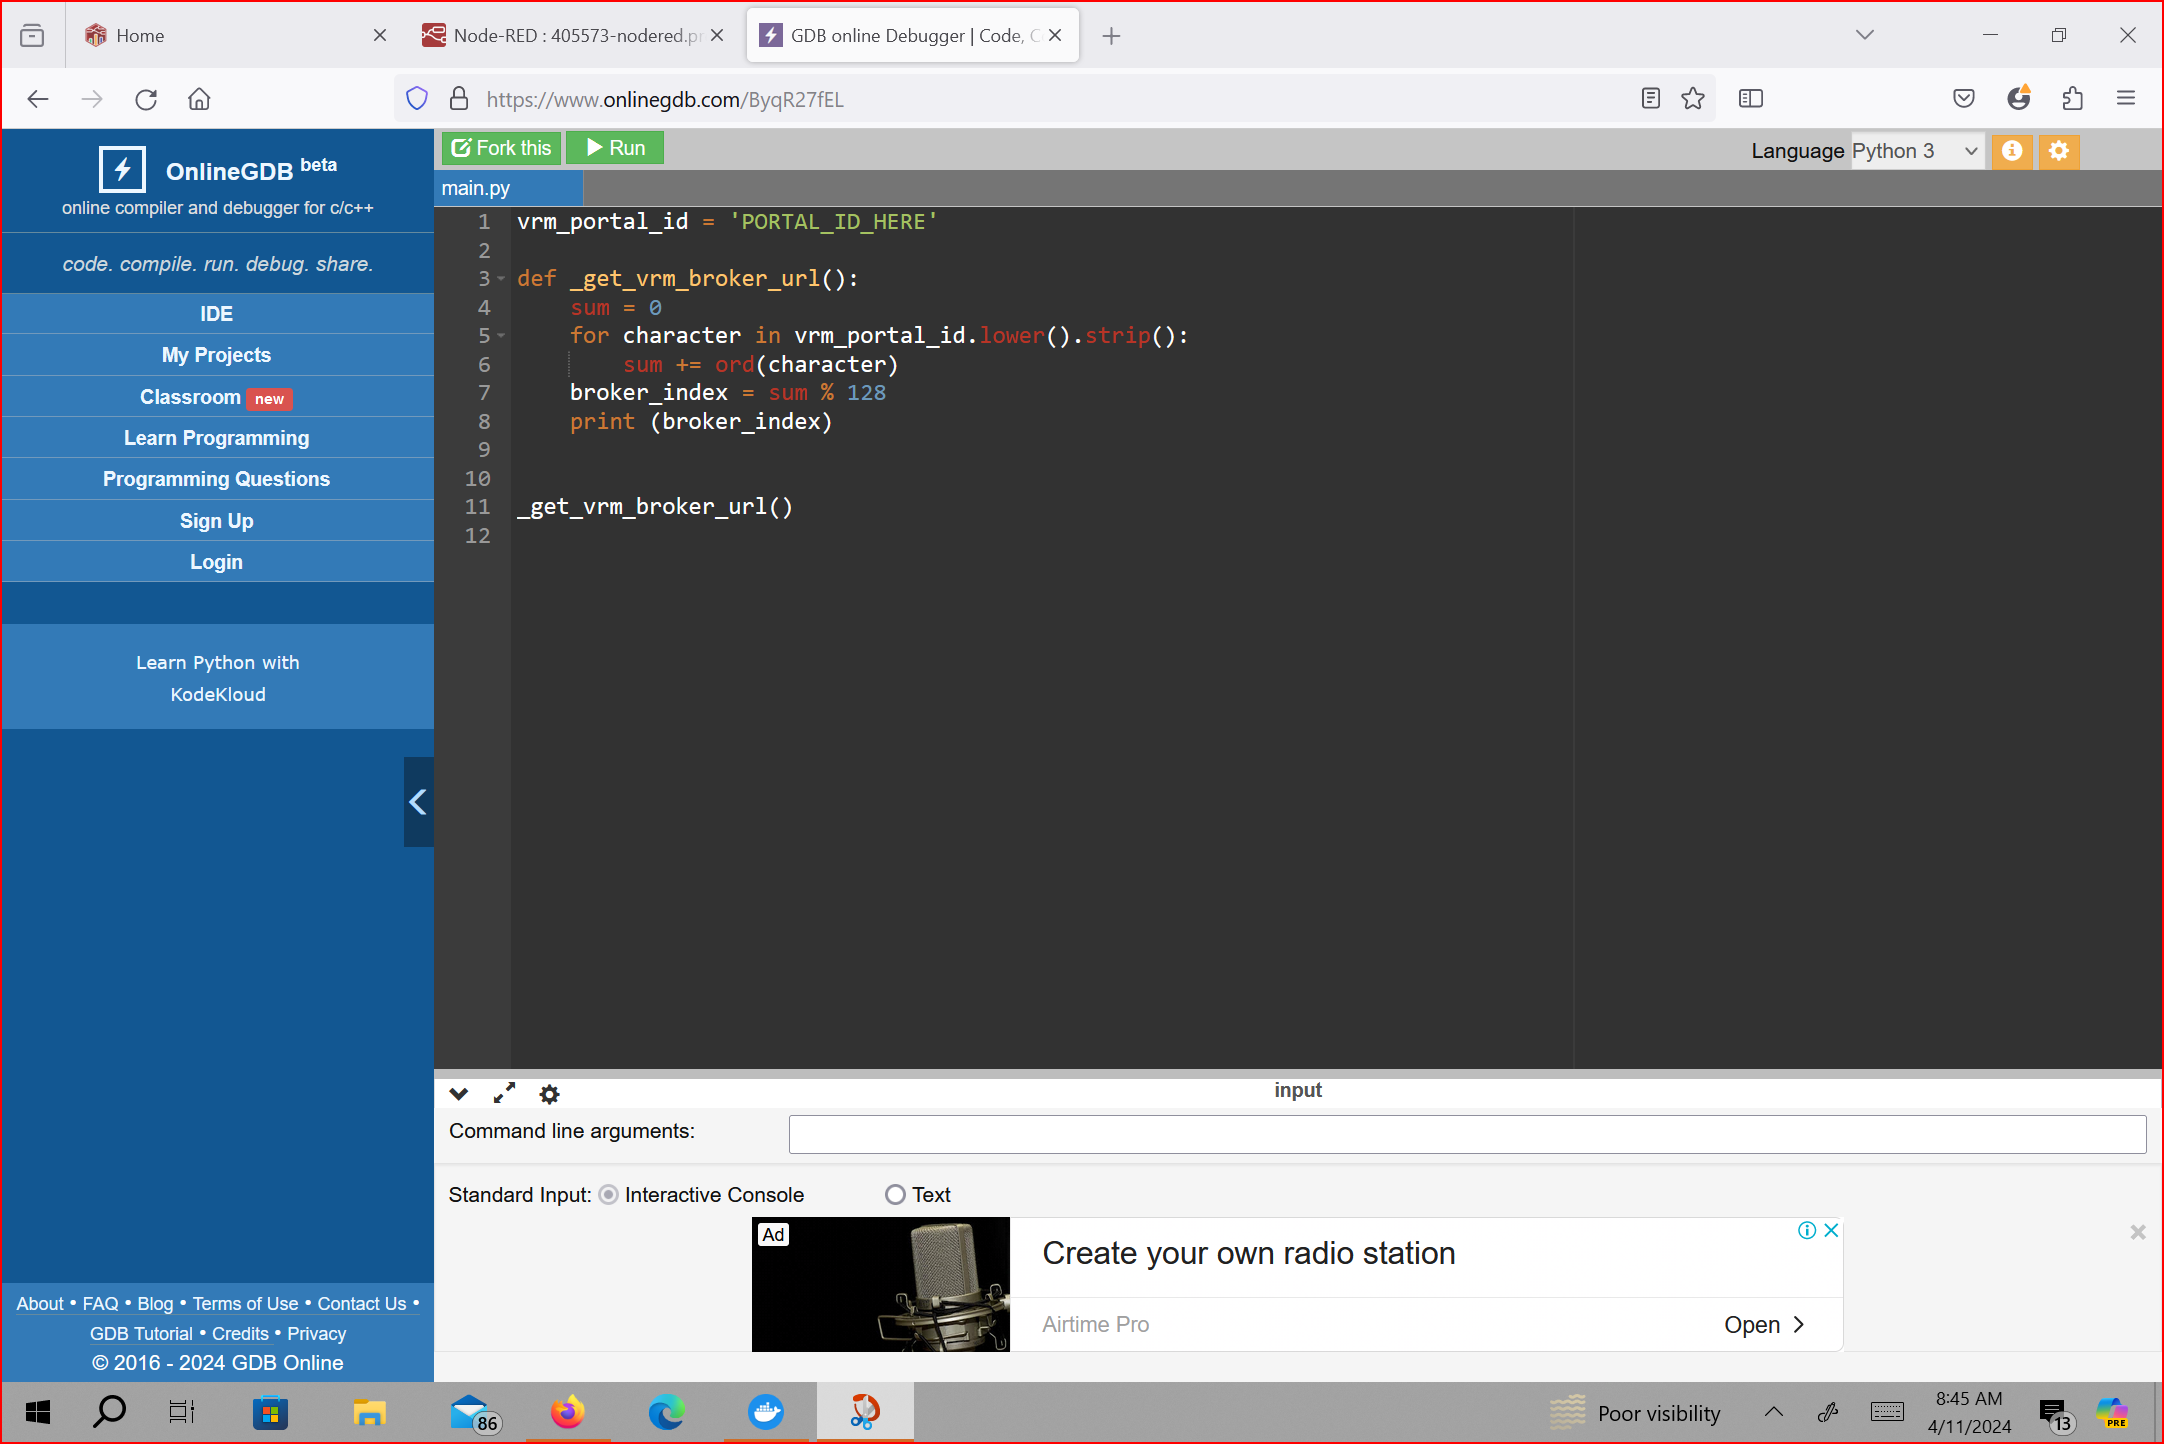
1. Identified my Victron MQTT server or "broker" (there are many servers and you can be on any), using the C/C++ script online here: https://www.onlinegdb.com/ByqR27fEL
Refer to screenshot*.
Victron publishes exactly the same script in Python that works offline on GitHub: https://github.com/victronenergy/dbus-mqtt
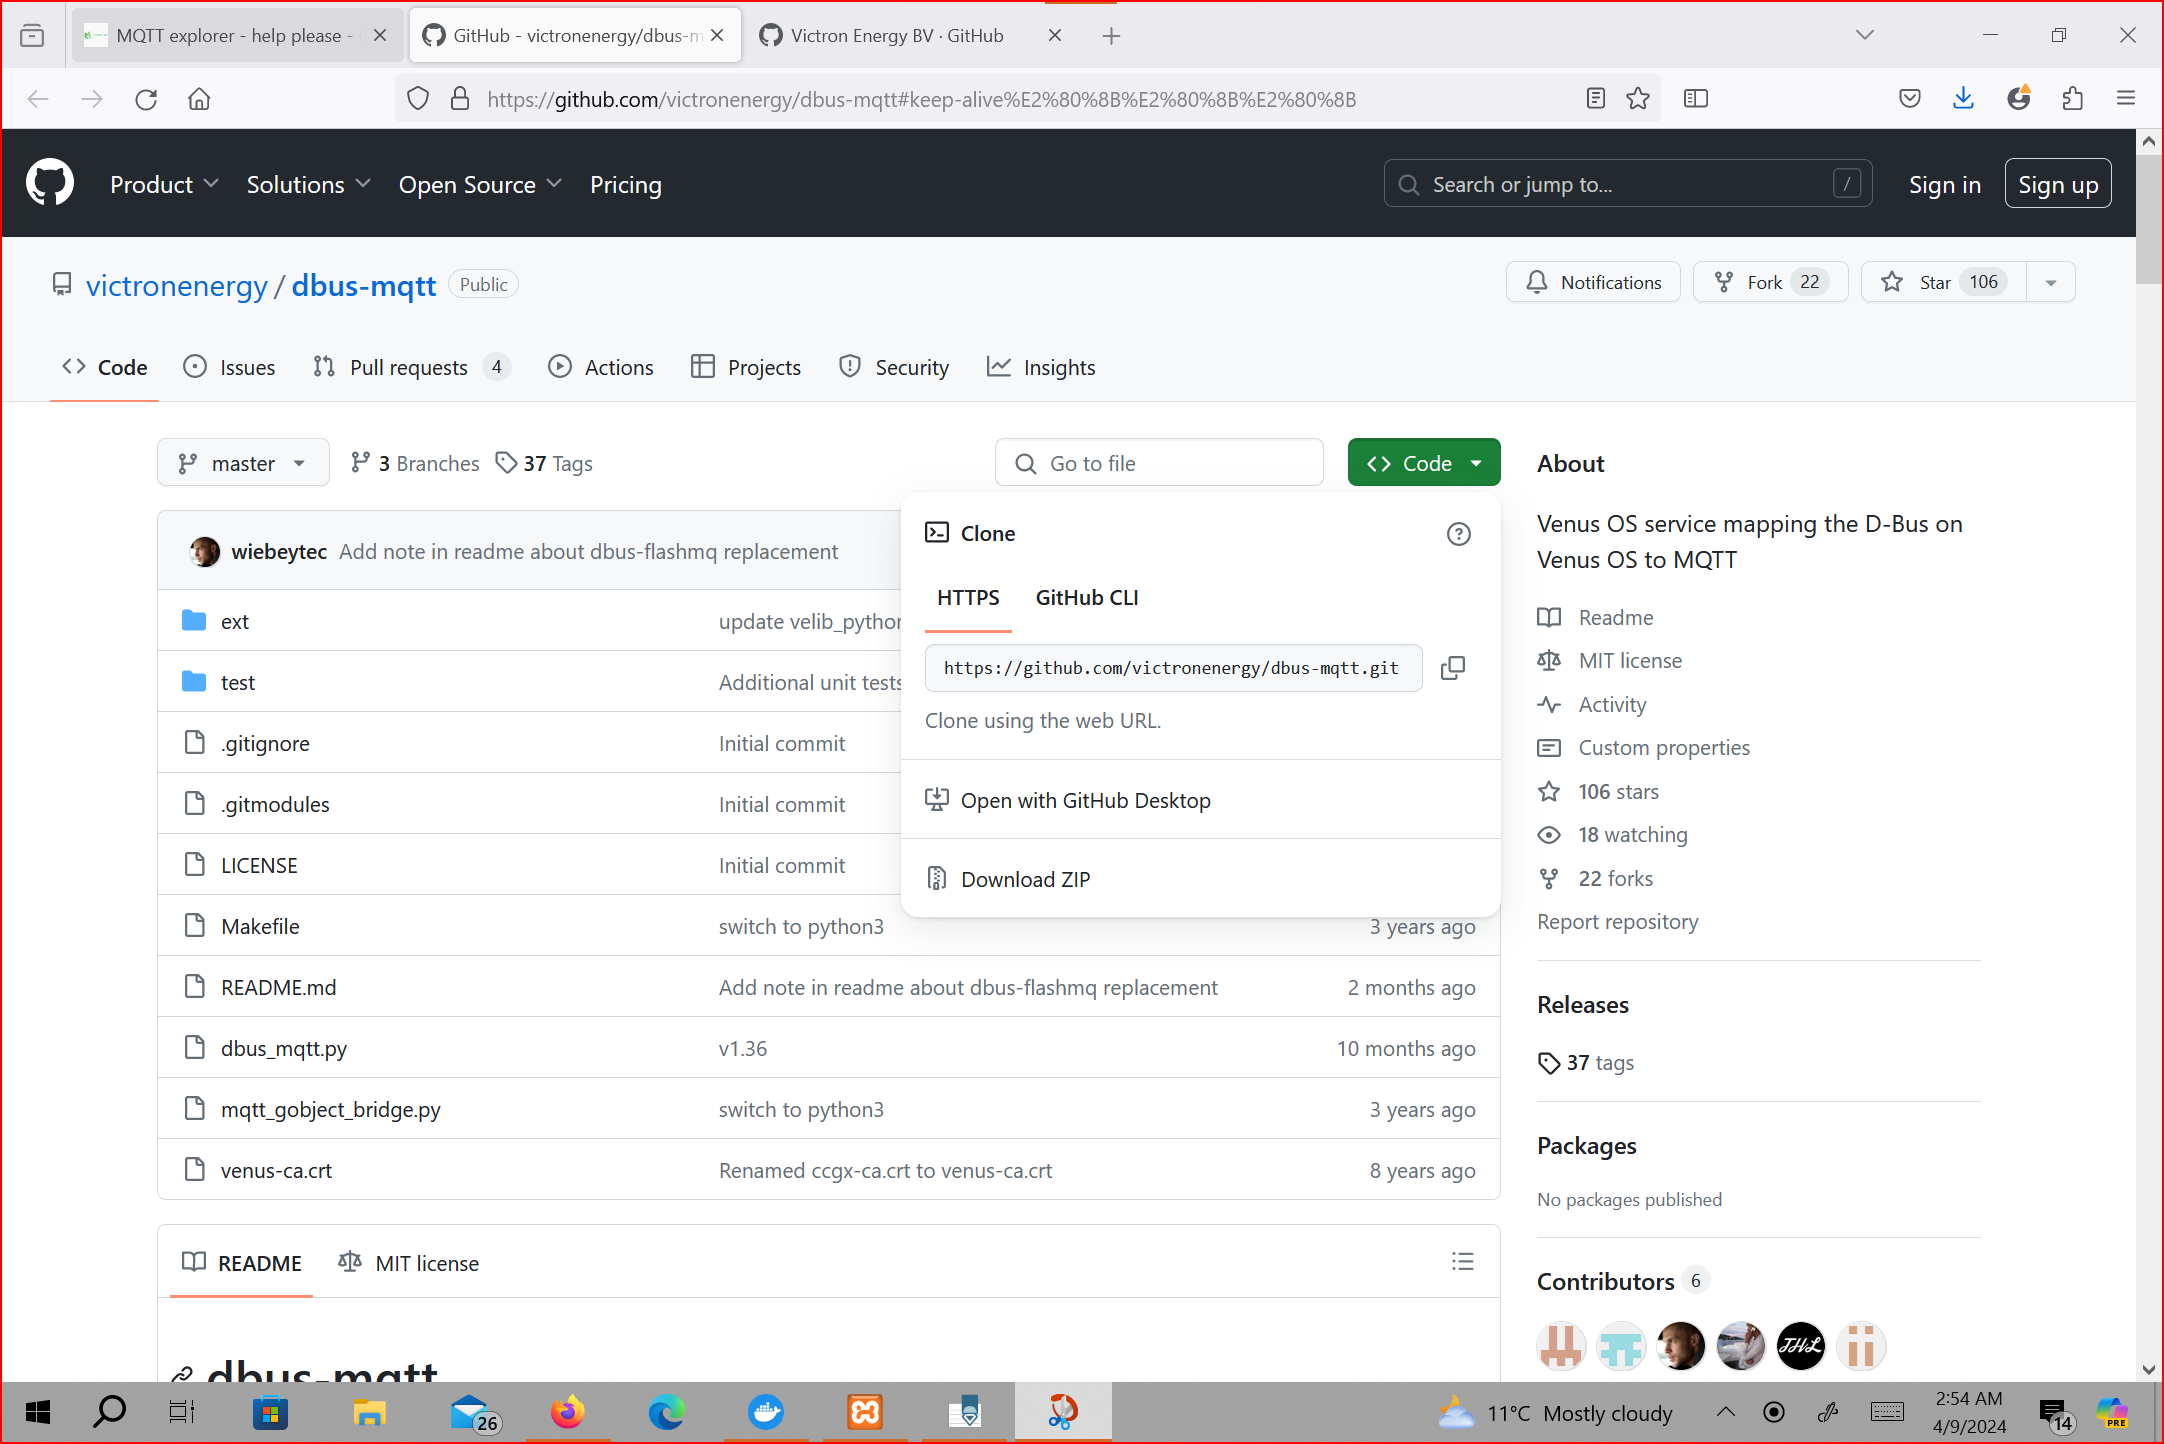
2. Got the Victron certificate using Victron's Github link. It’s hard to find. It’s included in a directory ("repository" if you want to be technical) called “dbus-mttq” here: https://github.com/victronenergy/dbus-mqtt
See screenshot*.
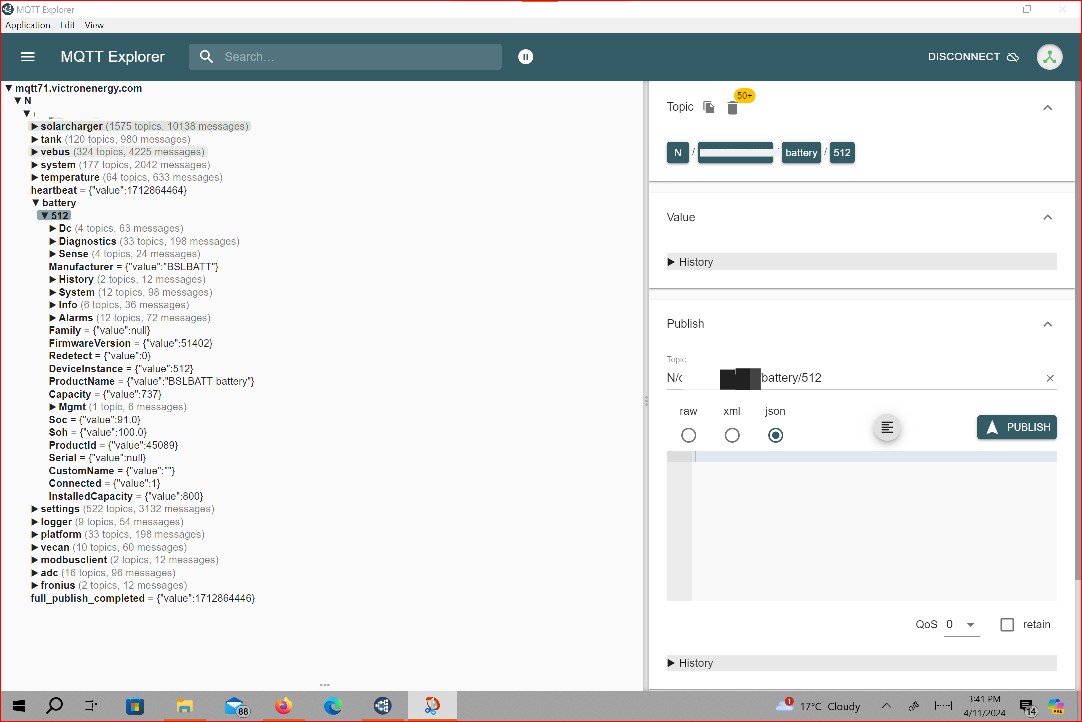
3. Downloaded and installed MQTT Explorer on my Windows 10 tablet.
4. Connected MQTT Explorer successfully. See screenshot*.
Now that I have Node Red up and running, I'm tempted to experiment. I have seen integrations with Home Assistant, openHab, Shelly energy meters and smart switches. Next project: divert power when the batteries are full. Note that the same thing can be accomplished with Victron "assistants".
*PS: I couldn't upload some screenshots marked by a star (*). They are in my comment below.