This is a resurrected guide I had attempted to start making with an old home automation platform and NodeRed, and have since brought back with a vengeance to Home Assistant for any of those interested. What I have on offer today suits me well currently, but I will do my best to help anyone if you’re trying to build other MQTT entities and having issues. MQTT is very easy to use and setup even if you have never heard of MQTT before, I encourage anyone to give this a try if it would be useful. This looks long and intimidating at first glance, but once you start this likely will take an hour or less!
This may be reposted elsewhere as anyone sees fit, my only goal is to further knowledge among the community and help people build ESS projects like mine.
Quick note: This guide currently involves an odd method of using both MQTT brokers running on VenusOS and Home Assistant, and then linking the two. I will be working on updating the guide to hopefully get VenusOS to connect directly to Home Assistant’s broker.
Pre-requisites:
- Working installation of Home Assistant. This guide will not cover how to deploy that, you can get started here if you aren’t familiar: https://www.home-assistant.io/installation/
- Victron system deployed and setup with a Venus OS device running firmware 3.33 – other versions more than likely will work, 3.33 is tested and verified working at the time of writing. I’m also using a Venus GX, if you’re using a home-made Pi version your results may vary for all I know.
- Static IPs on Home Asisstant and Venus OS
- MQTT Explorer installed on desktop, not strictly required but highly useful: https://mqtt-explorer.com/
- Free Home Assistant Add-ons installed (Settings – AddsOns – AddOn Store): Mosquitto broker, Terminal & SSH, File Editor
NodeRed is NOT required.
Preparing Home Assistant and Venus OS for Connection
I will start by crediting KidA001 who posted this guide on github, his guide covers pretty much all the steps from start to finish, but only touches upon reading data from VenusOS, and does not include controlling ESS, some other steps I felt needed tweaks as well but this first part is sourced directly from his guide here: https://gist.github.com/KidA001/dc5584db340cf3ad513f9415b20ed5fa
Enable MQTT On your VenusOS Device
Go to the IP address of your Venus device in your web browser. From there go to Settings > Services and enable Modbus, MQTT (SSL) and MQTT (Plaintext)
Setup Mosquitto MQTT Broker
From your HomeAssistant instance go to Settings > Add-Ons and click the AddOn Store button and search for Mosquitto broker. Select it and install.
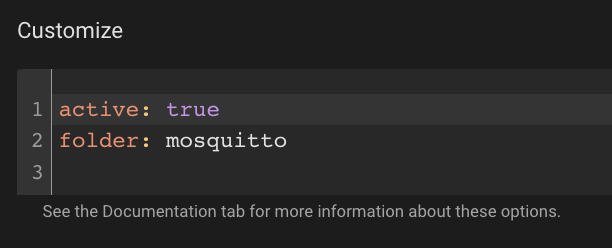
In the Configuration tab of Mosquitto go to the Customize section and ensure active: true and folder: mosquitto are set:

Setup a bridge between your Victron MQTT and HomeAssistant/Mosquitto
This allows all data from Victron to be mirrored on your HomeAssistant's Mosquitto Broker. This is a functional way to setup MQTT from Venus to HA, instead of using the VenusOS device as a MQTT server. I didn't quite understand this initially, but it does work.
Open the Teriminal Web View in HomeAssistant, there should be a button in your Nav menu on the left if you already installed it into HomeAssitant. It should bring you to a HomeAssistant console like below:

From there lets go into the mosquitto directory with:
cd /share/mosquito
*you may need to create this directory with mkdir /share/mosquito first
Then lets create the file we'll use for victron config with:
touch victron.conf
Now lets edit that file and add some config. Open in nano editor with
nano victron.conf
Add the following config and replace ‘YOURIP’ with your VenusOS IP Address:
connection victron
address YOURIP:1883
topic N/# in 0 victron/
topic R/# out 0 victron/
topic W/# out 0 victron/
Hit control + X and then Y and enter at the prompt to save. Go back to the Mosquitto Broker AddOn and restart the service.
Add a MQTT User in HomeAssistant
In HA you need to create a User account that will be used to login to the MQTT Server you just setup. In HA go to Settings > People and select the Users tab at the top. Create a user with a username & password, note this for the next couple steps:
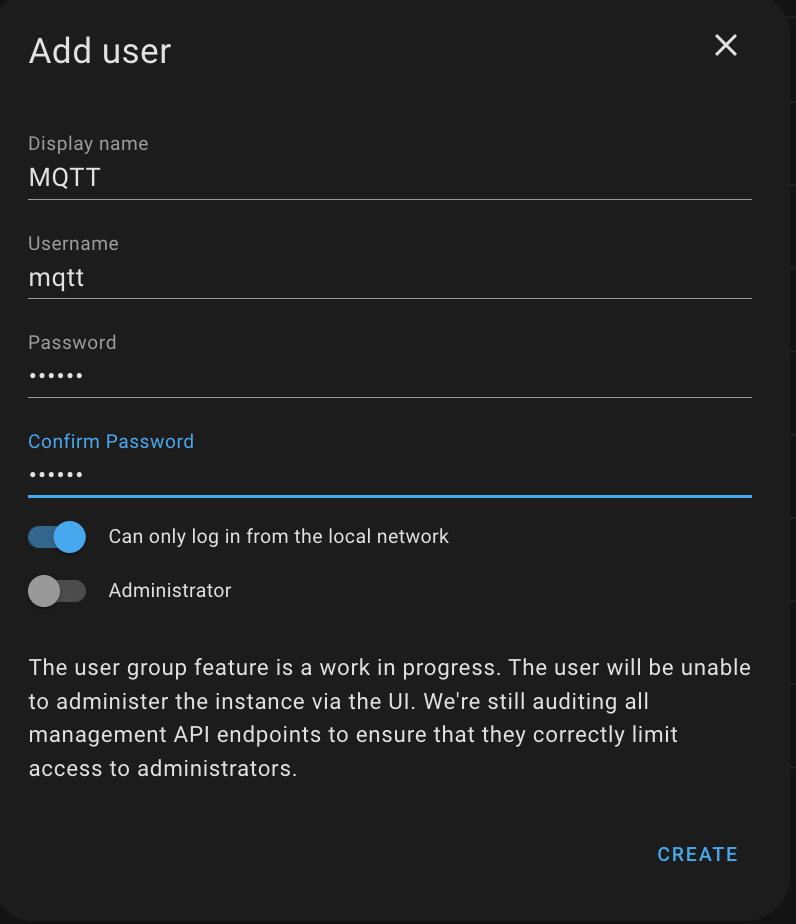
If you have issues on your network logging into your MQTT service try disabling ‘Can only log in from the local network’
Create a KeepAlive Automation
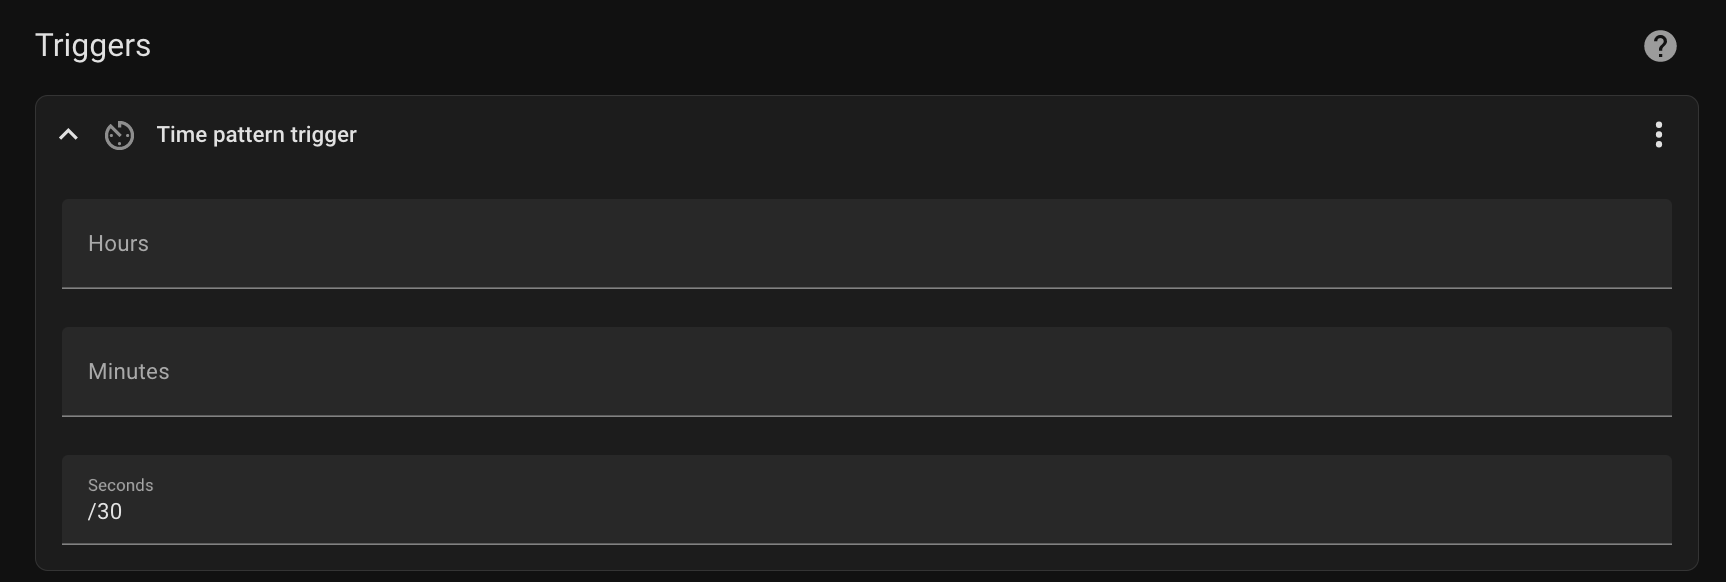
The MQTT service on Victron needs to be kept alive. We do this by sending a keep-alive message every 30-seconds.
In HomeAssistant go to Settings > Automations & Scenes, create a new Automation called Victron MQTT KeepAlive. The trigger should be Time Pattern and set to every 30 seconds which is expressed as /30
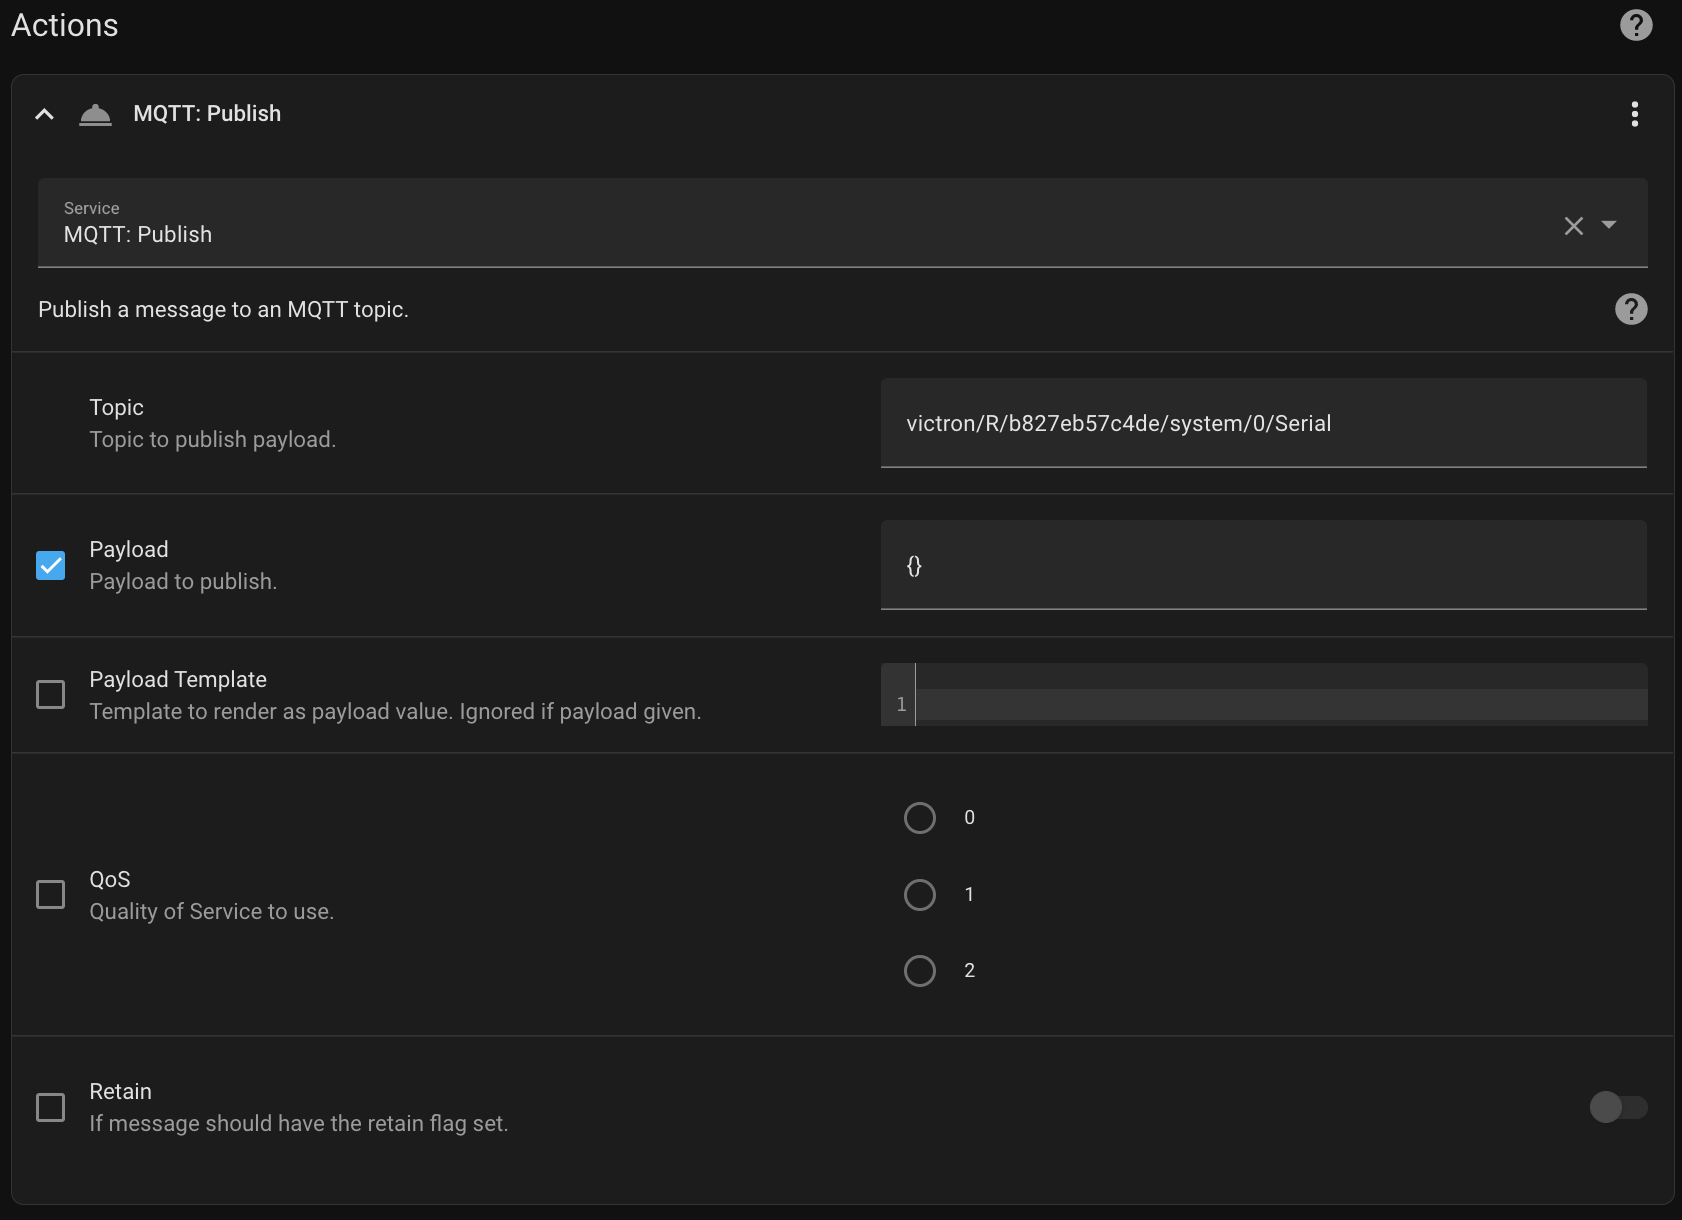
Then the action should be Call Service and select MQTT: Publish. The topic is victron/R/your-venus-id/system/0/Serial, payload: {}. Hit save and you're done.
Verify Mosquitto has Victron data!
Once this automation triggers, you should be able to read a ton of data now from your Home Assistant MQTT broker. To verify the steps you just performed worked, open MQTT Explorer and do the following: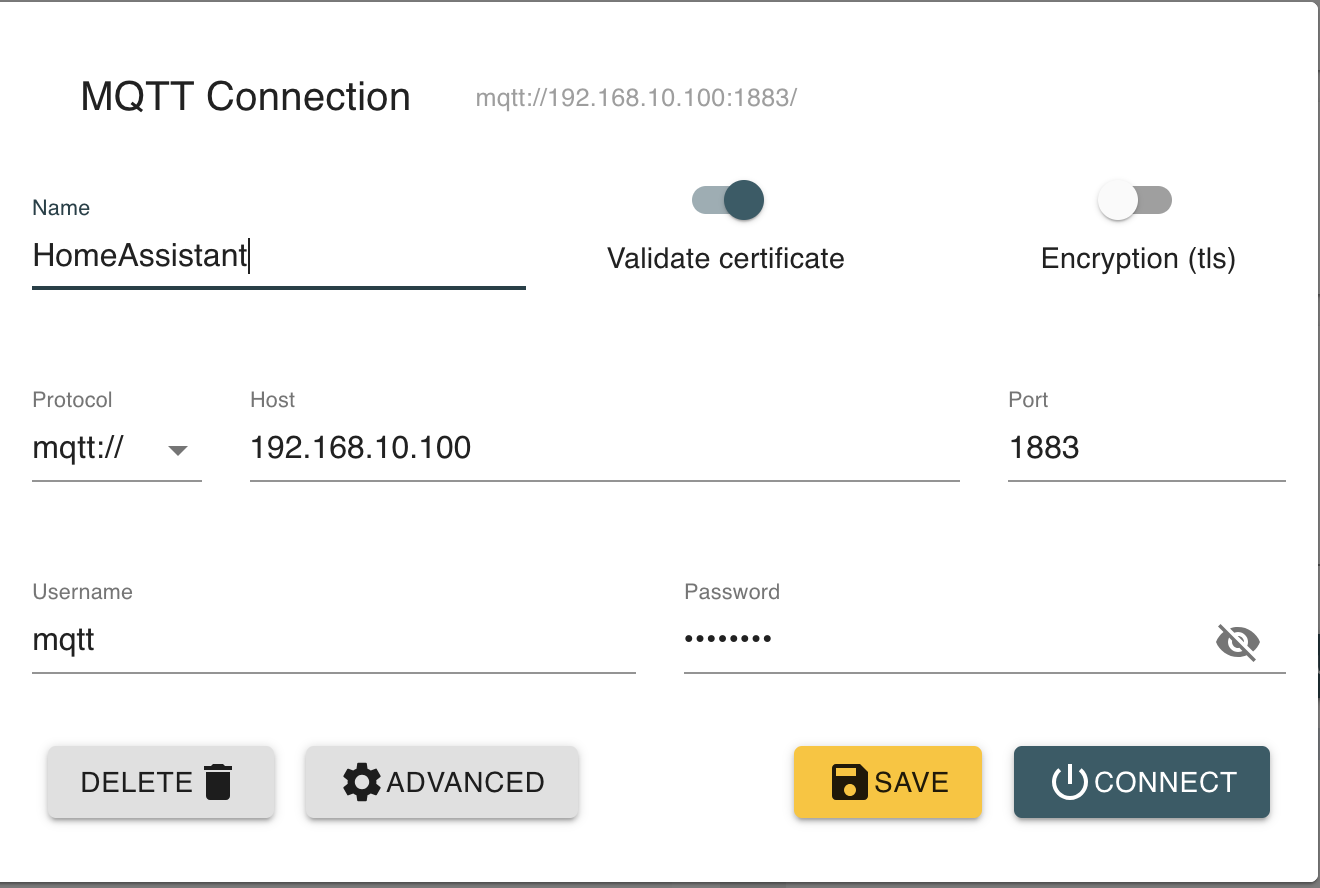
For the Host provide the IP Address of your HomeAssistant where you see 192.168.10.100 in the screenshot. For Username and Password, use the ones you created from the step above, “Add a MQTT User in HomeAssistant”
If everything is setup properly, you should start to see data from your Victron Equipment show up. It will be under the victron/N key. Make note of the ID beneath that highlighted, mine below is b827eb5c4de. This is the unique ID for your Victron System and you'll need to reference in your config later.

If this is working, you've done all the hard stuff!
Add the MQTT Integration in HA
Next we just need to configure MQTT in Home Assistant under Settings – Devices & Services. Click Add Integration in the bottom right if you don’t see MQTT there already, and add it. Then hit configure, and enter the username and password created during earlier in the guide during “Add a MQTT User in HomeAssistant”.
If you already had MQTT deployed from other projects, you just need to verify what user and password you configured it with. Click the arrow next to MQTT, then ‘configure’ next to mosquitto, then ‘reconfigure MQTT’ to see what the current user is set to.
Add MQTT Devices to HomeAssistant
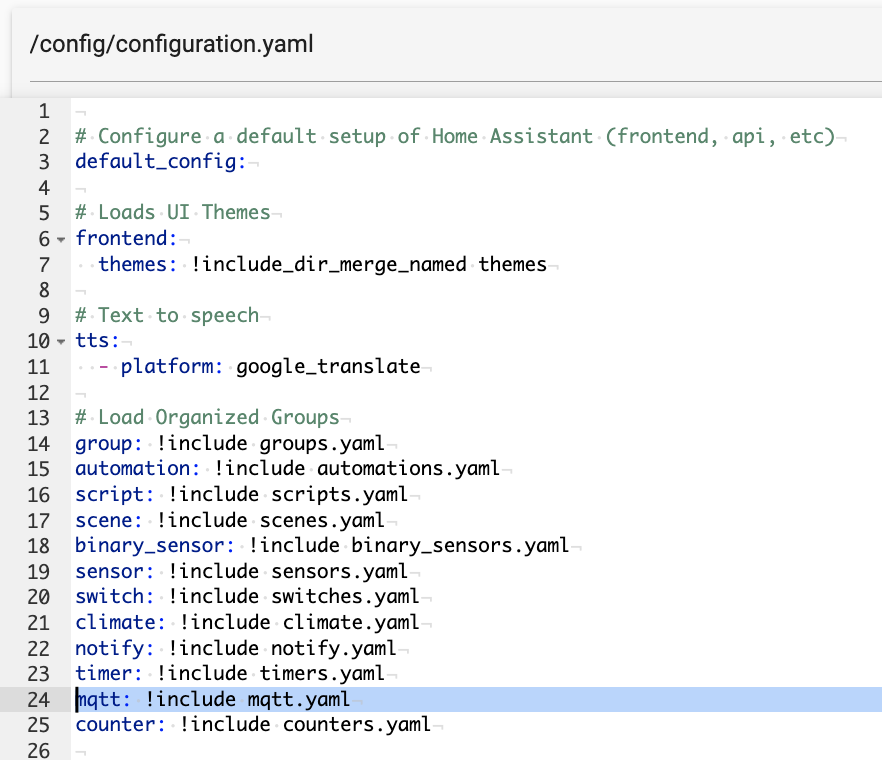
Use the FileEditor AddOn in HomeAssistant. There should be a button in the left Navigation Pane if you've checked all the boxes when installing it. From there, open the main configuration.yaml file and add this line:
mqtt: !include mqtt.yaml
Your config may or may not have a lot of the other stuff shown below, the important part is the highlighted line is added to your file.
Now create a new file called mqtt.yaml to match. Do this by clicking the folder icon in the top left and then clicking the New File icon.
Select the mqtt.yaml file we just created, and you can start adding code/devices.

From here you can just copy paste what code I have linked below, you can also reference KidA001’s guide which has a bunch of devices and sensors he setup – again all credit prior to this point goes here: https://gist.github.com/KidA001/dc5584db340cf3ad513f9415b20ed5fa
*Note: you will need to replace '985dad8185e7' with your own instance ID. And for the couple devices that use a 'vebus' topic, your ID may differ from mine (261), make sure you use your VEbus ID. Last, make sure you update the 'max' value for Inverter and Charge power based on your system. These don't reallly matter if you set to 99999, as your system won't exceed what it's physically capable of, but I like it to keep the interface in HAOS clean.
sensor:
  # Battery state of charge
  - state_topic: "victron/N/985dad8185e7/system/0/Batteries"
    name: "Battery SOC"
    unique_id: "battery_soc"
    device_class: battery
    value_template: '{
                 { value_json.value[0].soc | round(0) }}'
    unit_of_measurement: "%"

      # AC Loads (all phases combine)
  - state_topic: "victron/N/985dad8185e7/vebus/261/Ac/Out/P"
    name: "AC Load"
    unique_id: "ac_load"
    value_template: '{
                 { value_json.value }}'
    unit_of_measurement: "W"
    icon: mdi:power-socket-uk

  # DC Loads
  - name: "DC Load"
    unique_id: "dc_load"
    device_class: power
    state_topic: "victron/N/985dad8185e7/system/0/Batteries"
    value_template: '{
                 { value_json.value[0].power|float(0)|round(0) }}'
    unit_of_measurement: "W"
    icon: mdi:battery-charging-outline

     # Multiplus Temp
  - name: "System Temperature"
    unique_id: "victron_temperature"
    state_topic: "victron/N/985dad8185e7/vebus/261/Dc/0/Temperature"
    value_template: '{
                 { (value_json.value) | round(1) }}'
    unit_of_measurement: "°C"
    icon: mdi:thermometer


number:
    #ESS Grid Setpoint
  - name: "Grid Setpoint"
    unique_id: "grid_setpoint"
    state_topic: "victron/N/985dad8185e7/settings/0/Settings/CGwacs/AcPowerSetPoint"
    command_topic: "victron/W/985dad8185e7/settings/0/Settings/CGwacs/AcPowerSetPoint"
    command_template: '{"value": {
                 { value }} }'
    value_template: '{
                 { (value_json.value) | round(0) }}'
    unit_of_measurement: "w"
    mode: "box"
    icon: mdi:transmission-tower
    min: -10000
    max: 10000

    #ESS Max Inverter Power
  - name: "Max Discharge Power"
    unique_id: "dicharge_power"
    state_topic: "victron/N/985dad8185e7/settings/0/Settings/CGwacs/MaxDischargePower"
    command_topic: "victron/W/985dad8185e7/settings/0/Settings/CGwacs/MaxDischargePower"
    command_template: '{"value": {
                 { value }} }'
    value_template: '{
                 { (value_json.value) | round(0) }}'
    mode: "box"
    unit_of_measurement: "w"
    icon: mdi:battery-charging-low
    min: 0
    max: 6400

    #ESS Max Battery Charge Power
  - name: "Max Charge Power"
    unique_id: "charge_power"
    state_topic: "victron/N/985dad8185e7/settings/0/Settings/CGwacs/MaxChargePower"
    command_topic: "victron/W/985dad8185e7/settings/0/Settings/CGwacs/MaxChargePower"
    command_template: '{"value": {
                 { value }} }'
    value_template: '{
                 { (value_json.value) | round(0) }}'
    mode: "box"
    unit_of_measurement: "w"
    icon: mdi:battery-charging-high
    min: 0
    max: 5000


switch:
    #ESS Mode
  - name: "ESS Mode"
    unique_id: "ess_mode"
    state_topic: "victron/N/985dad8185e7/settings/0/Settings/CGwacs/BatteryLife/State"
    command_topic: "victron/W/985dad8185e7/settings/0/Settings/CGwacs/BatteryLife/State"
    payload_on: '{"value": 10}'
    payload_off: '{"value": 9}'
    state_on: "10"
    state_off: "9"
    value_template: "{
                 { value_json.value }}"
    icon: mdi:home-battery-outline
This will get you a dashboard that shows you all this – I have not done any editing at all to clean this up, group them together or make the dashboard look nice, all which you definitely can. This is exactly what you’ll get just from my code, some of which I took from the entries in the github and tweaked a bit, and others which allow you to actually interact with are all my own setup:
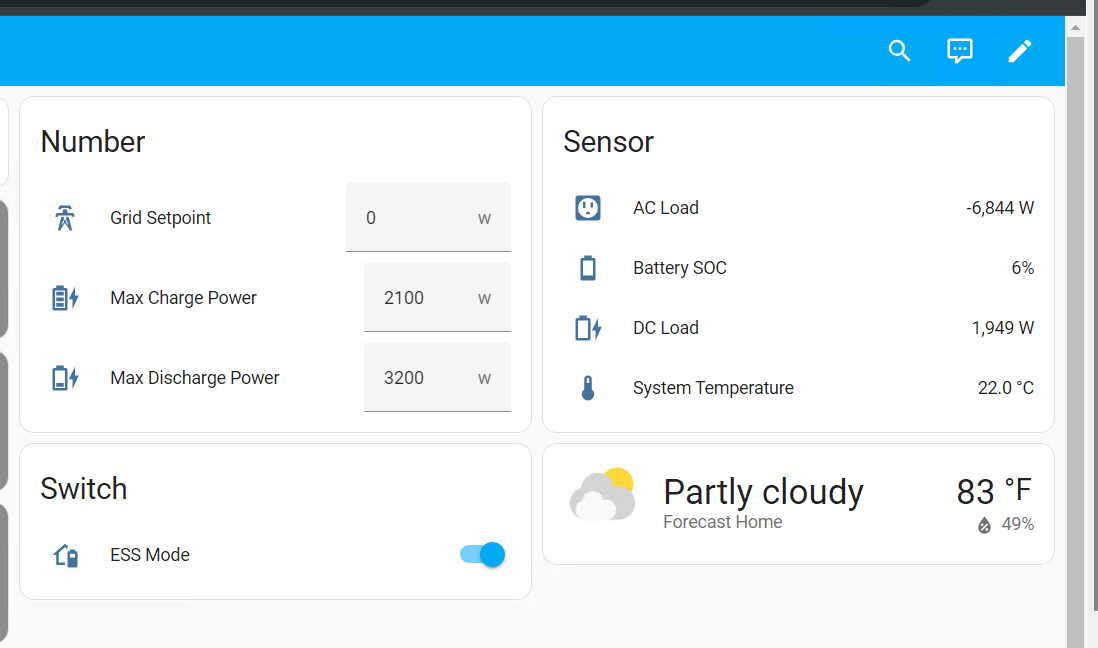
Some key takeaways here, this is *fully* bi-directional. You can change Grid Setpoint or charge power on the Remote Console, or in VRM and the values will update in HomeAssistant right here accordingly, and vice versa. I tweaked my code to obtain the temperature from the MultiPlus as I don’t have a battery temp sensor connected to my GX itself. AC Loads are calculated from all phases, KidA001 had his coded to pull just from L1. ESS Mode switch toggles between Optimized (without battery life) when switch is On, and Stay Charged when Off – you can edit this code accordingly with a value of ‘5’ for Optimized (with battery life).
Using this control, you can do interesting things by linking 3rd party demand-response incentive programs. For example, OhmConnect (https://www.ohmconnect.com/) will actually pay you in points that can be redeemed for cash money for “reducing” energy usage during events. Using this control, you can have Home Assistant respond to those events which can be integrated by using IFTTT. If your energy provider allows back-feeding, you can have your system start dumping all it’s got back to the grid during these events, even going into the negatives counts as “saving” energy during those evets, and you’ll get points for every KwH your system outputs during that time. And even if back-feeding isn’t allowed, you can have the system go into self-consumption mode during a time it otherwise wouldn’t when an event triggers.
Such technologies are starting to become known as 'Virtual Power Plants' and seem to be encouraged by utility providers in certian areas like Calfornia. The problem is utility providers typically have incredibly poor oppertunities for capitializing on these savings, which usually are limited to some sort of device that turns off your central AC unit when the grid is stressed. I hope to see a new era of smart technoligies like this being able to participate as our world starts to electrify rapdily. Good luck to everyone out there embarking on this project!
Some resources to help you build other MQTT devices in Home Assistant that read data from Victron or anything else:
If you're new to MQTT this is a good getting started guide, in particular the links to the different types of MQTT devices and their page on Home Assistant's site is very useful: https://resinchemtech.blogspot.com/2023/12/adding-mqtt-devices.html
These specific device types should help you create most of what you need to interface with your system:
https://www.home-assistant.io/integrations/sensor.mqtt/